


95
To use the Numbering function:
1
Rotate
+
until
16/21 NUMBER
is displayed, and then press
+
(OR hold down
c
and press
O
once). The message “START?” appears in the display.
☞
To cancel the
Numbering
function at any time, hold down
c
and press
O
(or press just
*
).
2
Rotate
+
(OR press
f
,
w
,
h
or
e
) until the first character that you wish to
select for the number field is flashing.
3
Press
+
(OR press
r
). The message “END?” appears in the display.
☞
If a bar code was selected, “NUMBER” appears in the display instead. Skip to step
6
to continue printing with the
Numbering
function.
4
Rotate
+
(OR press
f
,
w
,
h
or
e
) until all of the characters that you wish
to select for the number field are flashing.
☞
A bar code cannot be selected in addition to other characters.
5
Press
+
(OR press
r
). The message “NUMBER” appears in the display.
6
Rotate
+
(OR press
h
or
e
) until the desired number of copies is displayed, or
use the number keys to type in the number.
7
Press
+
(OR press
p
or
r
) to begin printing the labels. The number of each
copy is displayed while it is being printed.
☞
If the Auto cut function is set to ON, each label is automatically cut off after it is
printed.
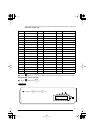
EXAMPLE
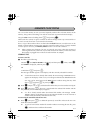
To print three labels with numbers 1, 2 and 3:
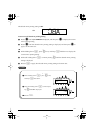
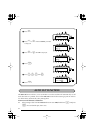
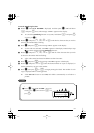
1 Rotate + until 16/21 NUMBER is displayed,
and then press + (OR hold down c and
press O.)
START?
1:
STUDIO _
Caps
Alt
1