


Aligning the Print Head Position Manually from Your Computer
Print head alignment corrects the installation positions of the print head and improves deviated colors and
lines.
This printer supports two head alignment methods: automatic head alignment and manual head alignment.
Normally, the printer is set for automatic head alignment.
If the printing results of automatic print head alignment are not satisfactory, perform manual head alignment.
The procedure for performing manual print head alignment is as follows:
Print Head Alignment
1.
Open the printer driver setup window
2.
Click Custom Settings on the Maintenance tab
The Custom Settings dialog box opens.
Note
• If the printer is off or if communication between the printer and the computer is disabled, an
error message may appear because the computer cannot collect the printer status.
If this happens, click OK to display the most recent settings specified on your computer.
3.
Switch head alignment to manual
Check the Align heads manually check box.
4.
Apply the settings
Click OK and when the confirmation message appears, click OK.
5.
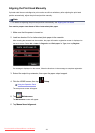
Click Print Head Alignment on the Maintenance tab
The Start Print Head Alignment dialog box opens.
6. Load paper in the printer
Load two sheets of A4 size or Letter size plain paper into the cassette.
Note
•
If the cassette paper information registered on the printer is not set to A4 size and plain paper,
an error may occur. For instructions on what to do if an error occurs, see "Paper setting for
Printing."
For details about the cassette paper information to be registered on the printer, see the
following:
•
Paper Settings on the Printer Driver and the Printer (Media Type)
•
Paper Settings on the Printer Driver and the Printer (Paper Size)
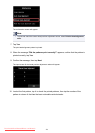
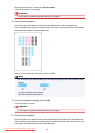
7. Execute head alignment
223
Downloaded from ManualsPrinter.com Manuals