


Setting for Scanning from the Operation Panel
You can make the setting for scanning from the operation panel.
Important
• Set IJ Scan Utility to use your scanner or printer via a network connection beforehand.
Setting for Scanning with IJ Scan Utility
1.
Check that IJ Network Scanner Selector EX is running.
If IJ Network Scanner Selector EX is running, (IJ Network Scanner Selector EX) appears in the
notification area on the desktop. Click to check the hidden icons as well.
Note
•
If the icon is not displayed in the notification area on the desktop, follow the procedure below to
start.
•
Windows 8.1 / Windows 8:
Click IJ Network Scanner Selector EX on the Start screen.
If IJ Network Scanner Selector EX is not displayed on the Start screen, select the Search
charm, then search for "IJ Network Scanner Selector EX".
• Windows 7/Windows Vista/Windows XP:
From the Start menu, click All Programs > Canon Utilities > IJ Network Scanner
Selector EX > IJ Network Scanner Selector EX.
The icon appears in the notification area on the desktop, and the Scan-from-PC Settings screen
appears. In that case, skip ahead to Step 3.
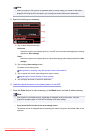
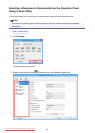
2.
In the notification area on the desktop, right-click (IJ Network Scanner Selector EX),
then select Settings....
The Scan-from-PC Settings screen appears.
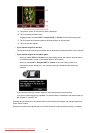
3.
Click Scan-from-Operation-Panel Settings.
The Scan-from-Operation-Panel Settings screen appears.
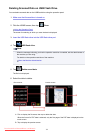
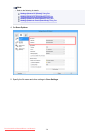
4. Select your scanner or printer from Scanners and click OK.
Select the MAC address of your scanner or printer.
Note
•
When multiple scanners are connected via a network, you can select up to three scanners.
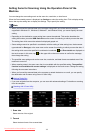
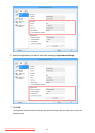
5. In the Scan-from-PC Settings screen, click OK.
Note
• If your scanner or printer does not appear, check the following, click OK to close the screen, then
reopen it and try selecting again.
767
Downloaded from ManualsPrinter.com Manuals