27
EN
Creating a Large Label by Combining Smaller
Parts (Large Label)
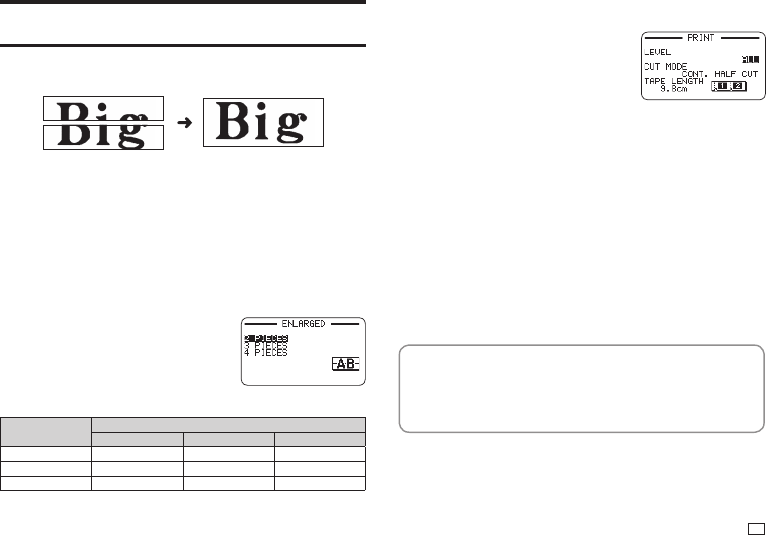
You can print multiple parts and then assemble them into a large, multi-part
label.
Example: To create a sign consisting of two parts
Important!
•
Make sure that a 12mm (
1
/
2
") wide or wider tape cartridge is loaded in the
printer.
•
Printing on an 18mm (
3
/
4
") wide tape or 24mm (1") wide tape will result
in margins above and below the printing. Trim away the margins before
assembling the parts into a fi nal label. When using 18mm (
3
/
4
") or 24mm
(1") wide tape, printing on transparent tape and overlapping of the pieces is
recommended.
1.
On the main menu, select NEW and then press SET.
2.
Select ENLARGED and then press SET.
3.
Input text and then press SET.
4.
Specify the size of the fi nal (combined label) text and then press SET.
Tape width
Text Size
2 PIECES 3 PIECES 4 PIECES
12mm (
1
/
2
") 24mm (1") 36mm (1
7
/
16
") 48mm (1
7
/
8
")
18mm (
3
/
4
") 30mm (1
3
/
16
") 45mm (1
3
/
4
") 60mm (2
3
/
8
")
24mm (1") 30mm (1
3
/
16
") 45mm (1
3
/
4
") 60mm (2
3
/
8
")
"2 PIECES" means "printing is divided between two parts". Printing can be
divided among up to four parts.
5.
Select PRINT and then press SET.
•
A preview image (page 19) of the parts
that make up a large label cannot be
displayed.
6.
Specify which of the parts of the label you want to print and then press
SET.
•
Normally select ALL here.
7.
Specify a cut mode (page 21) and then press SET.
•
When printing multiple parts that contain a large amount of text, you
may not be able to print all of the parts with a single tape cartridge. In
this case, printing one part of a time while keeping an eye on how much
tape remains in the cartridge you are using is recommended. If a tape
cartridge runs out of tape during printing, press ESC to stop printing,
replace the cartridge, and then restart printing.
•
Printing text that has a lot of black or performing continuous printing
can cause the printer to overheat. If this happens, printing will pause
and the message PLEASE WAIT will appear on the printer display.
Printing will resume automatically when the printer returns to normal
temperature.
•
If printing starts to pause with the message PLEASE WAIT on the
display too frequently, try lowering the print density setting.
Confi guring Print Format Settings
You can confi gure the print format settings below as you input text.
•
Vertical or horizontal text direction
•
Mirror printing enable/disable
While inputting text, press FORM to display the print format setting screen
and then confi gure the settings you want.
