44
EN
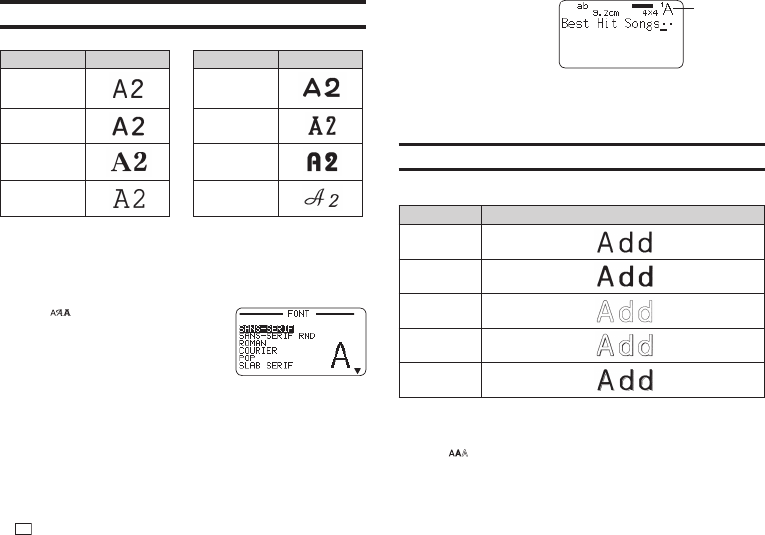
Changing the Font
Your printer supports the fonts below.
Font Example Font Example
SANS-SERIF
POP
SANS-SERIF
RND
SLAB SERIF
ROMAN BORDEAUX
HEAVY
COURIER CURSIVE
•
When a font other than SANS-SERIF or ROMAN is being used some
numbers, Greek characters, and Russian characters will still be printed
using SANS-SERIF or ROMAN.
Changing the Font of Previously Input Text
1.
Press .
2.
Select the font you want and then
press SET.
3.
Select the range of text where you want to
apply the font setting and then press SET.
•
If you selected ALL for a free design label, simply press SET.
•
If you selected something else for a free design label, use steps 4 and
5 to specify a range of text.
4.
Move the cursor to the fi rst character of the text whose font you want to
change and then press SET.
5.
Move the cursor to the last
character of the text whose
font you want to change and
then press SET.
•
The font of the text being
input is shown in the upper
right corner of the display screen.
•
You can use SET UP (page 51) to specify the printer's initial power on
default font. When using STORED DATA or PREVIOUS DATA for text,
the font setting will be the font specifi ed when the data was created.
Changing the Character Style
You can use the following character styles to emphasize text: NORMAL,
BOLD, OUTLINE, SHADOW, RAISED.
Style Example
NORMAL
BOLD
OUTLINE
SHADOW
RAISED
•
Character styles cannot be used with illustrations or user characters.
1.
Input text.
2.
Press .
3.
Select the character style you want to change and then press SET.
Font indicator


