29
EN
1.
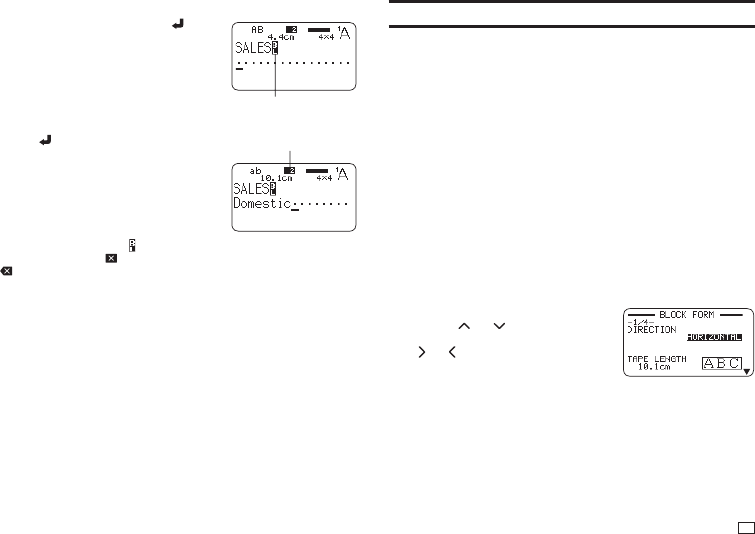
Input the text for the fi rst block.
2.
Press FUNCTION and then press .
•
This makes the input text a block.
3.
Input line 1 of the next block's text,
press
, and then input line 2.
•
To delete a block indicator (
), move the cursor to the indicator you want to
delete and then press . You can not delete a block indicator by pressing
.
•
A label can have up to 16 blocks.
•
For information about a two-line label, see page 28.
Block indicator (not printed)
Indicates in which block the
cursor is currently located.
Specifying the Label Print Format
You should change the print format in accordance with the label length,
character spacing, text alignment, etc. You can change the format of each
block and for the overall label.
Specifying the Print Format of Each Block
You can specify text direction, text alignment, and other settings for each
block (page 28).
1.
Input text and divide it into blocks.
2.
Move the cursor to the block whose print format you want to change.
•
The cursor can be located anywhere within the block.
3.
Press FORM.
•
If there is only one block in the label, advance to step 6. In this case,
you can confi gure either block print format or overall print format
settings.
4.
Select BLOCK FORM and then press SET.
5.
Select ONE BLOCK and then press SET.
•
To apply the same print format to all of the blocks, select ALL
BLOCKS.
6.
Confi gure the settings of each item.
•
Use the
and arrow keys to
select a setting item and then use
and to change its setting.


