38
EN
4.
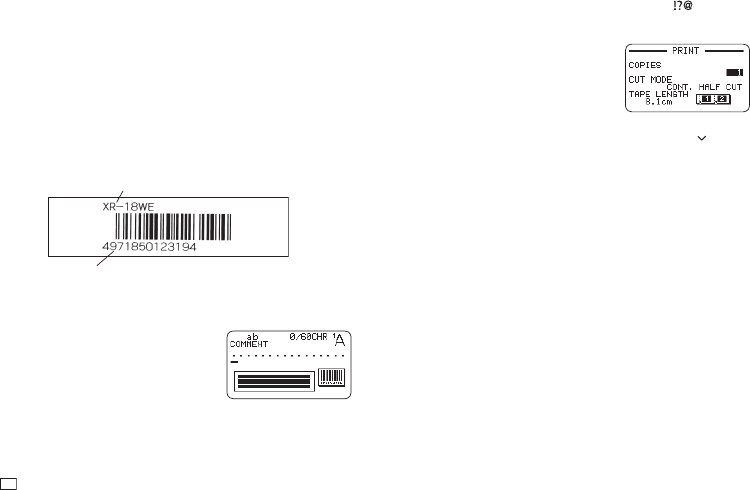
Input comment text (0 to 60 characters) and then press SET.
•
Without inputting any comment text, press SET.
5.
Input data and then press SET.
•
In the case of CODE39 and CODABAR, you can press
and then
input symbols.
6.
Select the size of the bar code label and then press SET.
7.
Select PRINT and then press SET.
8.
Specify the number of copies to be printed and then press the arrow
key.
•
Direct input of values is also supported.
•
You can specify from 1 to 100 copies.
9.
Specify a cut mode (page 21) and then press SET.
Important!
•
Be sure to use a 12mm (
1
/
2
") wide or wider tape cartridge for bar code label
printing.
•
You can input comment text above a bar code (up to 60 characters).
•
You should confi rm that a printed bar code can be read correctly before
actually using it. If a bar code cannot be read correctly, make the
adjustments below.
Lighten the print density (page 51).
Increase the size of the print (step 6, page 38).
Use FULL CUT or UNCUT as the cut mode (page 21).
•
The tapes below are suitable for bar code label printing.
•
Black lettering on white tape (WE)
•
Blue lettering on white tape (WEB)
•
Black lettering on yellow tape (YW)
The letters in parentheses indicate the tape model number.
Sample Print
Data
Tex t
1.
On the main menu, select NEW and then press SET.
2.
Select BAR CODE and then press SET.
3.
Select the type of bar code you want to use
and then press SET.
•
If you select ITF, CODE39, or CODABAR
as the bar code type, specify whether or
not to include a check digit and then press
SET.


