


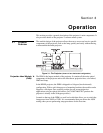

Section 3: Operation
3-2 RPMX/CX50/CX60/CX67 User’s Manual
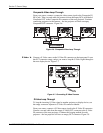
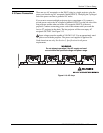
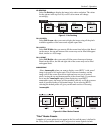
The EM is the main control unit of the projector. It is mounted independently
from the PHM to the mounting tray. It is the module where all source
connections are made and where the main power switch is located.
The EM contains the majority of PCB’s, such as the Control PCB, BNC Input
PCB, Video Input PCB and Control RS-232C PCB. In general, these boards are
responsible for the video processing and communication requirements of the
projector. It also houses the IR sensor PCB and the Power PCB.
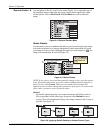
Located on the input side of the EM are 3 LEDs. These LEDs will illuminate in
patterns, which represent the status of the projector and/or any error conditions
that may be present. Refer to Table 3.1. for the status of the LEDs during normal
operation and at the end of this section for system error codes.
Table 3.1 Normal LED Status
System State Power LED Fan LED Lamp LED Description &
Condition
AC off Off Off Off Projector OFF.
AC on Red Off Off In stand-by
AC on Green Green Off Projector power
ON, but lamp not
AC on Green Green Green Projector ON
Flashing
Red
Green Off Projector in “cool
down” mode after
powering down
Entering
Stand-by
Mode
Red Off Off After 30 seconds,
the fan stops and
the projector
returns to stand-by.
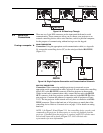
You can correct the geometry of a displayed image by adjusting the uniquely
designed 6-axis adjustment mechanism. The PHM can be mounted to this
mechanism in a lens horizontal (0 degree) or a lens vertical (90 degree)
orientation. The mechanism, which is manually adjusted, can be adjusted to
correct any geometric misalignment between the projector and the screen.
Typically, this mechanism only requires adjustment during the initial setup of the
projector. Adjustments can be locked in place to avoid tampering and the need
for re-adjustment.
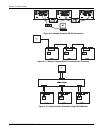
The 6-axis adjuster and EM are mounted to a welded frame called the mounting
tray. The purpose of this tray is to keep the modules together and makes the
installation process easy. It can be installed on any sturdy, flat surface as long as
all four mounting points are used to secure it in place.
Refer to the separate Installation Guide provided in the User’s Kit for installation
instructions and how to adjust the 6-axis adjuster.
NOTE:
Do not ceiling mount this projector.
Electrical Module (EM)
'
6-
A
xis Ad
j
uster '