


Section 3: Operation
RPMX/CX50/CX60/CX67 User’s Manual 3-11
to the point where one large stripe fills the image. Again, the image may still
exhibit some noise.
NOTE: 1) By default, the projector will sample at the correct frequency for most
sources. 2) Not available for video sources. 3)
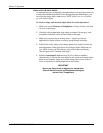
SHORT CUT: Press
Pixel
and
adjust the top slidebar.
Pixel phase
Use this option to adjust the phase of the pixel sampling clock relative to the
incoming signal. It is used primarily for adjusting RGB inputs.
Adjust pixel phase when the image (usually from an RGB source) shows
shimmer or “noise”. Pixel phase adjustment is done most effectively using a
proper test pattern, such as a smooth gray consisting of a clear pattern of tiny
black and white dots, or a similar graphic image, such as the Windows shutdown
screen. Adjust this option until the image is stable and each dot is clearly defined.
Using the numbers on the slidebar as a guide, you will notice that you can
actually stabilize the image at more than one point—i.e., you may find that the
image appearance at "11" is identical to the image appearance at "38", thus you
can select either setting.
NOTE: 1) Adjust pixel phase after pixel tracking is properly set. 2) Not
applicable for video sources. 3)
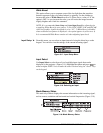
SHORT CUT: Press
Pixel
and adjust the bottom
slidebar.
H-Position
Use this option to move the image to the left or to the right.
SHORT CUT: Press
Position
and adjust top slidebar.
V-Position
Use this option to move the image up or down.
SHORT CUT: Press
Position
and adjust bottom slidebar.
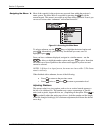
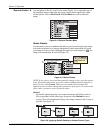
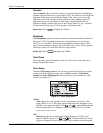
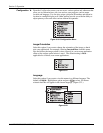
Use the options in the Image Settings menu to alter the image for brightness,
contrast etc. Options that are not available will appear in yellow text. Any
changes made to the option under this menu are immediately applied and saved
upon exiting the menu. (Figure 3.10.)
Figure 3.10. Image Settings Menu
Ima
g
e Settin
g
s '