


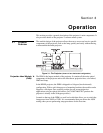

Section 3: Operation
RPMX/CX50/CX60/CX67 User’s Manual 3-5
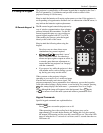
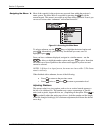
PROJECTOR
Press
Projector
to access options for communication with a specific projector or
all projectors within a network.
All Projectors – You can toggle the setting for this option using the
Enter
key. Set All Projectors to YES if you have a single stand-alone unit or
want to enable broadcast control to multiple projectors in a network. In
this case, when you send a command using the IR keypad all projectors
will respond.
Projector ID – This option is not selectable when All Projectors is set
to YES. When NO is selected, you can choose which projector in the
network you want exclusive communication with by entering the two-
digit projector ID number.
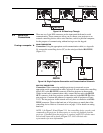
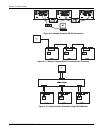
Refer to 3.7 Using Multiple Projectors for more details.
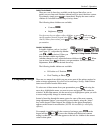
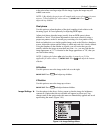
PIXEL
Press
Pixel
to access the pixel tracking and pixel phase double slidebar.
Adjust pixel tracking first: use
and to increase or decrease the
frequency of the pixel sampling clock to correct consistency of the image.
For proper phase, use
ON
and
OFF
to increase or decrease pixel phase so
that any shimmer disappears and the image is stable throughout. See Size and
Position for a complete explanation of tracking and phase.
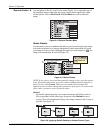
POSITION
Press
Position
to move the image using the double slidebar. Use and
to move the image left or right, use
ON
and
OFF
to move the image up or
down.
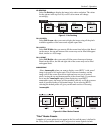
TEST P
Press
Test P
to display one of the available test patterns. Press
Test P
again to
display the next available pattern in the sequence. Press
Exit
to stop cycling
through the internal test patterns and return to presentation level.
NOTE: You can also access test patterns from the Diagnostics and Service
menu. Select Test Patterns and from the drop down list highlight the test
pattern you want to display. Press
Enter
to select.
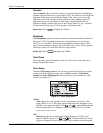
STATUS
Press
Status
to display the current status information of the projector.
FREEZE
Use this key to freeze and unfreeze the image. This key is only functional if
enabled through the Diagnostics and Service menu.
DISPLAY
Use
Display
to toggle the on screen display on or off.
INPUT KEYS
Press one of the following keys,
to select the
input you want to display.