


Section 3: Operation
3-8 RPMX/CX50/CX60/CX67 User’s Manual
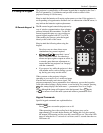
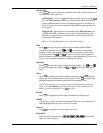
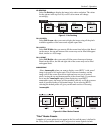
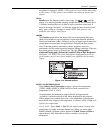
Use the options in the Size and Position menu (Figure 3.4.) to adjust the size of
the displayed image so that it fits the screen to best suit the application. Other
related options, such as Pixel Track and Pixel Phase are used to refine the
image.
Figure 3.4. Size and Position Menu
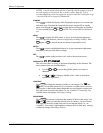
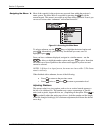
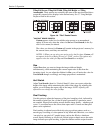
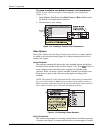
Resize Presets
Use this menu to access a submenu that allows you to quickly display the image
in its native resolution or to choose automatically other options that will resize
your image to fit your screen. Highlight the option you want and press
Enter
, the
image will automatically be resized (Figure 3.5.).
Figure 3.5. Resize Presets
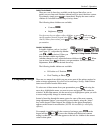
NOTE: If you select a preset and then manually change its size, using the options
in the Size and Position menu, you will see that an additional option appears in
Resize Presets called Custom. This item is not numbered in the menu and
appears because you have changed the parameters of the preset. To return to the
preset value, you must re-select it from the menu.
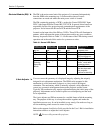
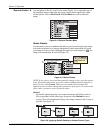
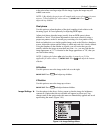
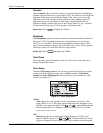
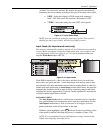
DEFAULT
By default, when displaying a new source the image will fill the screen as
fully as possible for that source type. In general, select Default for most
sources. This will automatically display your image, centered, and as large as
possible. See Figure 3.6.
Figure 3.6. Applying Default Resizing to Various Source Types
Size and Position '