


Section 3: Operation
3-20 RPMX/CX50/CX60/CX67 User’s Manual
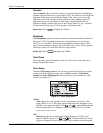
PROJECTOR ID
Use this option to set a specific 2-digit ID number for the projector. In a
network environment, having the ability to control one or all projectors is
very important. Assigning ID numbers to each projector in a network allows
you to do this.
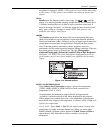
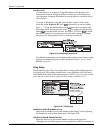
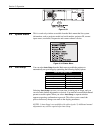
To assign an ID number using the option in the Communications menu,
select the option Projector ID. Press
Enter
twice until you see two dashed
lines, “- -”. Using the numbered keys on the keypad, enter a unique 2-digit
ID number for the current projector. Press
Enter
to accept and save the entry
and/or
Exit
to exit the menu or cancel. See Figure 3.25. Press
Status
to check
that the ID number for your projector was successfully changed. Continue
this process for each projector if you’re working in a network.
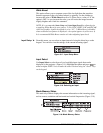
Figure 3.25. Assigning Projector ID
For additional information on switching communication control from a single
projector to multiple projectors (called “broadcast control”), see 3.7 Using
Multiple Projectors.
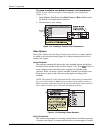
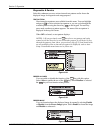
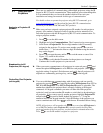
Tiling Setup
Use the options in the Tiling Setup menu when working with multiple projectors
in a display wall. The options provided allow you to define the size of the array
and identify the location of the current projector. NOTE: If you are using a stand-
alone unit, the values for each of the first four options should be set to 1.
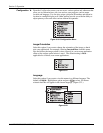
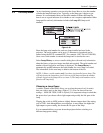
Figure 3.26. Tiling Setup
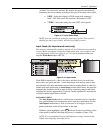
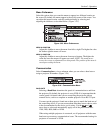
NUMBER OF ROWS & NUMBER OF COL
Enter the total number of rows and columns in the display wall by adjusting
the slidebar for each of these menu items. See Figure 3.26.
PROJECTOR ROW & PROJECTOR COL
Enter the specific row and column number for the current projector.
Although you can identify projectors in any pattern in a wall, it is common to