30-14
Cisco ASA Series Firewall ASDM Configuration Guide
Chapter 30 Configuring the ASA CX Module
Configuring the ASA CX Module
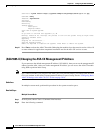
asacx-boot> system install https://upgrades.example.com/packages/asacx-sys-9.1.1.pkg
Username: buffy
Password: angelforever
Verifying
Downloading
Extracting
Package Detail
Description:
Requires reboot:
Cisco ASA CX System Upgrade
Yes
Do you want to continue with upgrade? [n]: Y
Warning: Please do not interrupt the process or turn off the system. Doing so might leave
system in unusable state.
Upgrading
Stopping all the services ...
Starting upgrade process ...
Reboot is required to complete the upgrade. Press Enter to reboot the system.
Step 12 Press Enter to reboot the ASA CX module. Rebooting the module closes the console session. Allow 10
or more minutes for application component installation and for the ASA CX services to start.
(ASA 5585-X) Changing the ASA CX Management IP Address
If you cannot use the default management IP address (192.168.8.8), then you can set the management IP
address from the ASA. After you set the management IP address, you can access the ASA CX module
using SSH to perform initial setup.
Note For a software module, you can access the ASA CX CLI to perform setup by sessioning from the ASA
CLI; you can then set the ASA CX management IP address as part of setup. See the “Configuring Basic
ASA CX Settings at the ASA CX CLI” section on page 30-16.
Guidelines
In multiple context mode, perform this procedure in the system execution space.
Detailed Steps
Multiple Context Mode
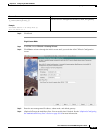
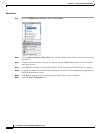
Step 1 In the System, choose Tools > Command Line Interface.
Step 2 Enter the following command:


