4-31
Using Set-Up Mode
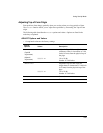
Recalling Factory Settings
Factory settings are those settings preselected at the factory. To recall (reset) the factory
settings, select the RCALL-FACT function and press the button or the button.
Options under the MACRO, INSTALL, and ADJUST functions are all initialized to the factory
settings.
Using the Diagnostic Functions
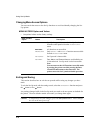
The TESTS function allows you to diagnose the printer with the following two functions:
PRINT-T (printing test)
HEX-DUMP (hex dump)
These functions are used for checking print quality and diagnosing printer problems. Hex
dump also provides useful information for programmers. There are two other options in the
TESTS function, but they are for service personnel only.
Printing Test
The printing test function prints test pages independently of your computer to check
printing operations and quality. It does not check the interface between the computer and
the printer.
The printing test prints all of the characters available in the ASCII character set. For color
printers having a color ribbon, printing occurs in four colors.
To start the printing test, make sure that continuous forms paper is loaded into the printer.
Enter the Set-Up mode and follow these steps:
1. Start the printing test (select the PRINT-T option).
Check that the red cursor stands under PRINT-T, and then press the button or
the button. The printer selects (underlines) PRINT-T and starts printing. A short help
menu is printed at the top of the page. Note that the printer is not ready for the
computer during printing test.
2. Exit the printing test.
Exit the printing test in either of the following ways after printing a dozen of lines:
To exit the printing test and return to the <TESTS> menu, press the button or
the button.
To exit the printing test and return to the <FUNCTIONS> menu, press the Exit/Save
button.
To exit the printing test and return to the Normal mode (ready), press the Set-Up/Quit
button. The printer temporarily saves any changes made while in the Set-Up mode
and returns to the Ready state.
3. Examine the test page.
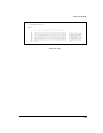
A sample test page is shown in step 5 Testing the Printer of the Installation Guide.


