


30 Dell PowerConnect 28xx Systems User Guide
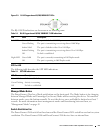
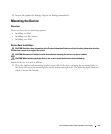
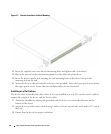
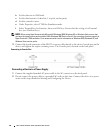
Figure 3-1. Bracket Installation for Rack Mounting
2
Insert the supplied screws into the rack mounting holes and tighten with a screwdriver.
3
Repeat the process for the rack-mounting bracket on the other side of the device.
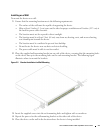
4
Insert the device into the rack, ensuring the rack-mounting holes on the device line up to the
mounting hole on the rack.
5
Secure the device to the rack with the rack screws (not provided). Fasten the lower pair of screws before
the upper pair of screws. Ensure that the ventilation holes are not obstructed.
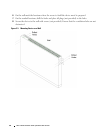
Installing on a Flat Surface
The device must be installed on a flat surface if it is not installed on a rack. The surface must be able to
support the weight of the device and the device cables.
1
Attach the self-adhesive rubber pads (provided with the device) on each marked location on the
bottom of the chassis.
2
Set the device on a flat surface, while leaving 2 inches (5.08 cm) on each side and 5 inches (12.7 cm) at
the back.
3
Ensure that the device has proper ventilation.