


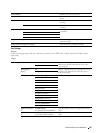

Apply New Settings After you change the settings, click this button to apply
the changes.
Restart printer to apply new settings Click this button to apply the changes.
*1
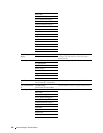
When you specify 1 minute for Sleep, the printer enters power saver mode 1 minute after it finishes a job. This uses much less energy,
but requires more warm-up time for the printer. Specify 1 minute if your printer shares an electrical circuit with room lighting and you
notice lights flickering.
Select a high value if your printer is in constant use. Under most circumstances, this keeps the printer ready to operate with minimum
warm-up time.
Select a value between 1 and 30 minutes for the power saver mode if you want a balance between energy consumption and a shorter
warm-up period.
The printer automatically returns to the standby mode from the power saver mode when it receives data from the computer. You can
also return the printer to the standby mode by pressing the
(Power Saver) button on the operator panel.
*2
Power Off Timer feature is available only in certain regions.
*3
This item is available only when the optional 550-sheet feeder is installed.
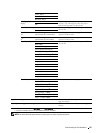
Maintenance
CAUTION: Using a non-Dell toner cartridge may severely damage your printer. The warranty does not cover damages caused
by using non-Dell toner cartridges.
Purpose:
To configure the paper density, the color registration adjustments, the initialization of the printer, and other
settings.
Va lue s :
Paper Density Plain Light Sets plain paper density.
Normal
Label Light Sets label paper density.
Normal
Color Auto Correct Click Start to perform color registration
Registration automatically.
Adjustments
Print Color Regi Chart Click Start to print a color registration chart.
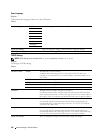
Registration LY(Left Yellow) Available Range: Sets lateral (perpendicular to paper feed
Adjustments -9 to +9 direction) and process (paper feed direction) color
LM(Left
Magenta)
LC(Left Cyan)
Available Range:
-9 to +9
Available Range:
adjustment values that are found in the color
registration chart individually for Yellow, Magenta,
and Cyan.
-9 to +9
RY(Right Available Range:
Yellow) -9 to +9
RM(Right Available Range:
Magenta) -9 to +9
RC(Right Cyan) Available Range:
-9 to +9
PY(Process Available Range:
Yellow) -9 to +9
PM(Process Available Range:
Magenta) -9 to +9
PC(Process Available Range:
Cyan) -9 to +9
Understanding the Tool Box Menus
154