


Removing and Installing Parts 155
4
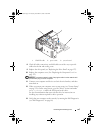
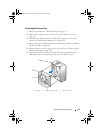
Remove the airflow shroud (see "Removing the Processor Airflow Shroud
Assembly" on page 148).
5
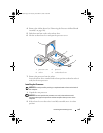
Push down and out on the socket release lever.
6
Lift the socket release lever and open the processor cover.
7
Remove the processor from the socket.
Leave the release lever extended in the release position so that the socket is
ready for the new processor.
Installing the Processor
NOTICE: Ground yourself by touching an unpainted metal surface on the back of
the computer.
1
Unpack the new processor.
NOTICE: You must position the processor correctly in the socket to avoid
permanent damage to the processor and the computer when you turn on the
computer.
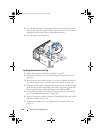
2
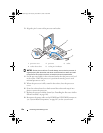
If the release lever on the socket is not fully extended, move it to that
position.
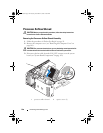
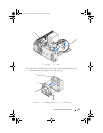
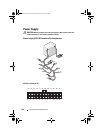
1 processor cover 2 processor
3 socket 4 socket release lever
11
2
4
3
book.book Page 155 Tuesday, November 27, 2007 10:29 AM