


Setting Up and Using Your Computer 33
Setting Your Computer to RAID-Enabled Mode
NOTICE: Back up any data you want to keep before entering the RAID-Enabled
mode. The RAID configuration procedure can result in loss of all data from the
hard drives.
1
Enter system setup (see "Entering System Setup" on page 179).
2
Press the up- and down-arrow keys to highlight
Drives
, then press <Enter>.
3
Press the up- and down-arrow keys to highlight
SATA Operation
, then
press <Enter>.
4
Press the left- and right-arrow keys to highlight
RAID On
, press <Enter>,
and then press <Esc>.
NOTE: For more information about RAID options, see "System Setup Options"
on page 180.
5
Press the left- and right-arrow keys to highlight
Save/Exit
, and then press
<Enter> to exit system setup and resume the boot process.
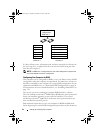
Using the Intel
®
RAID Option ROM Utility
NOTE: Hard drives of any size may be used to create a RAID configuration using the
Intel RAID Option ROM utility. Ideally, however, the drives should be of equal size to
avoid unallocated or unused space. For an explanation of RAID levels, see "About
Your RAID Configuration" on page 30.
Creating a RAID Level 0 Configuration
NOTICE: The following procedure will result in the loss of all data on your hard
drives. Back up any data you want to keep before continuing.
NOTE: Use the following procedure only if you are reinstalling your operating
system. Do not use the following procedure to migrate an existing storage
configuration to RAID level 0 configuration.
1
Set your computer to RAID-enabled mode (see "Setting Your Computer to
RAID-Enabled Mode" on page 33).
2
Press <Ctrl><I> when you are prompted to enter the Intel
®
RAID
Option ROM utility.
3
Press the up- and down-arrow keys to highlight
Create RAID Volume
,
then press <Enter>.
4
Enter a RAID volume name or accept the default name, then press <Enter>.
book.book Page 33 Tuesday, November 27, 2007 10:29 AM