


Removing and Installing Parts 157
9
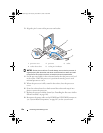
Close the computer cover (see "Replacing the Computer Cover" on
page 172).
NOTICE: To connect a network cable, first plug the cable into the network port or
device and then plug it into the computer.
10
Connect your computer and devices to electrical outlets, and turn them on.
System Board
CAUTION: Before you begin any of the procedures in this section, follow the
safety instructions in the Product Information Guide
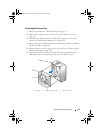
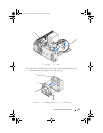
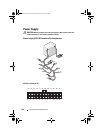
Removing the System Board
NOTICE: The system board and metal tray are connected and are removed as
one piece.
1
Follow the procedures in "Before You Begin" on page 99.
2
Remove the computer cover (see "Removing the Computer Cover" on
page 101).
3
Remove any full-length expansion cards (see "Removing a PCI Card" on
page 114 and "Removing a PCI Express Card" on page 121).
4
Remove the two screws securing the card fan assembly, then remove the
processor airflow shroud (see "Removing the Processor Airflow Shroud
Assembly" on page 148) and the Processor fan assembly (see "Removing
the Processor Fan Cage" on page 149 and "Removing the Processor Fan" on
page 151).
5
Remove the card fan assembly (see "Removing the Card Fan" on
page 152).
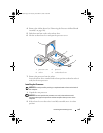
6
Remove any additional components that may restrict access to the
system board.
7
Disconnect all cables from the system board.
NOTICE: If you are replacing the system board, visually compare the replacement
system board to the existing system board to make sure that you have the correct part.
8
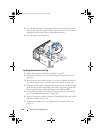
Remove the eight screws securing the system board assembly to the
chassis, slide the system board assembly towards the front of the computer
and lift it up and out.
book.book Page 157 Tuesday, November 27, 2007 10:29 AM