


Removing and Installing Parts 129
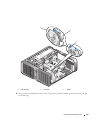
Installing the Processor Airflow Shroud Assembly
1
Follow the procedures in "Before You Begin" on page 85.
2
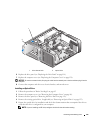
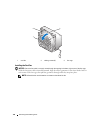
Remove the computer cover (see "Removing the Computer Cover" on page 86).
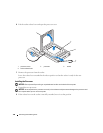
3
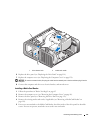
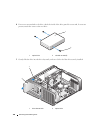
Align the hinge slots on the processor airflow shroud with the hinge guides on the system board.
4
Gently rotate the processor airflow shroud towards the fan, and then tighten the two captive screws.
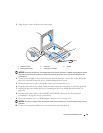
5
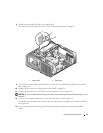
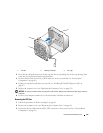
Connect the fan cable to the FAN1_CPU connector on the system board (see "System Board
Components" on page 89).
6
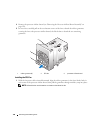
Close the computer cover (see "Replacing the Computer Cover" on page 159).
NOTICE: To connect a network cable, first plug the cable into the network port or device and then plug it into the
computer.
7
Connect your computer and devices to electrical outlets, and turn them on.
Processor
CAUTION: Before you begin any of the procedures in this section, follow the safety instructions in the Product
Information Guide.
NOTICE: Do not perform the following steps unless you are familiar with hardware removal and replacement.
Performing these steps incorrectly could damage your system board.
Removing the Processor
1
Follow the procedures in "Before You Begin" on page 85.
2
Remove the computer cover (see "Removing the Computer Cover" on page 86).
3
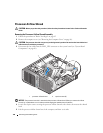
Disconnect the power cables from the POWER1 and POWER2 connectors (see "System Board
Components" on page 89) on the system board.
4
Remove the airflow shroud (see "Removing the Processor Airflow Shroud Assembly" on page 128).
5
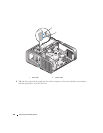
Push down and out on the socket release lever.