


Setting Up and Using Your Computer 35
5
Click
Custom
, then click
Next
.
6
Use the drop-down box to select
Striping
(RAID 0),
Mirroring
(RAID 1),
Stripe Mirroring
(RAID
0+1), or
RAID 5
.
7
Click
Next
.
The
Free Disk Selection
window appears.
NOTE: Only RAID-enabled hard drives are listed as free disks.
8
Click to select the drives that will make up the RAID configuration, click
Next
, and then click
Next
again.
NOTE: Your computer supports a maximum of two drives per RAID 1 array and four per RAID 0 array.
The
Clearing System Data
window appears.
NOTICE: The Clear System Data option deletes all data on the selected drive.
9
Click
Next
.
10
Click
Finish
to create the RAID configuration.
The MediaShield RAID management utility window appears and lists the array along with any other
installed hard drives.
Deleting a RAID Array
NOTE: While this procedure deletes the RAID 1 volume, it also splits the RAID 1 volume into two non-RAID hard
drives with a partition, and leaves any existing data files intact. Deleting a RAID 0 volume, however, destroys all
data on the volume.
NOTE: If your computer currently boots to RAID and you delete the RAID volume, your computer will become
unbootable.
1
Launch NVIDIA MediaShield.
2
Click to select the array you want to delete.
3
Click
Delete Array
in the
System Tasks
pane.
The
NVIDIA
Delete Array Wizard
appears.
4
Click
Next
.
A confirmation screen appears with the name and size of the array that you have marked for deletion.
5
Click
Finish
to delete the RAID configuration.
The MediaShield RAID management utility window appears and lists any remaining arrays along with
any other installed hard drives.
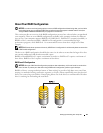
Converting From One RAID Configuration to Another RAID Configuration
NOTICE: In order to use the migrating option to convert a RAID configuration without losing data, your hard drive
must initially be set up as a single drive RAID 0 array before the operating system is loaded onto the drive (see
"Using the NVIDIA MediaShield ROM Utility" on page 33 for instructions).