


Removing and Installing Parts 131
3
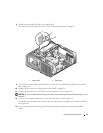
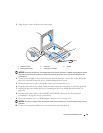
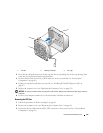
Align the pin-1 corner of the processor and socket.
NOTICE: Socket pins are delicate. To avoid damage, ensure that the processor is aligned properly with the socket,
and do not use excessive force when you install the processor. Be careful not to touch or bend the pins on the
system board.
4
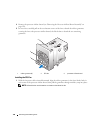
Set the processor lightly in the socket and ensure that the processor is level in the socket. When the
processor is positioned correctly, press it with minimal pressure to seat it.
5 When the processor is fully seated in the socket, close the processor cover.
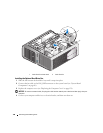
6 Pivot the socket release lever back toward the socket and snap it into place to secure the processor.
7
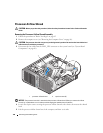
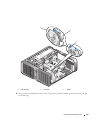
Replace the processor airflow shroud (see "Installing the Processor Airflow Shroud Assembly" on
page 129).
8
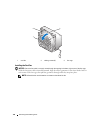
Reconnect the power cables to the POWER1 and POWER2 connectors (see "System Board
Components" on page 89) on the system board.
9
Close the computer cover (see "Replacing the Computer Cover" on page 159).
NOTICE: To connect a network cable, first plug the cable into the network port or device and then plug it into the
computer.
10
Connect your computer and devices to electrical outlets, and turn them on.
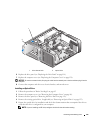
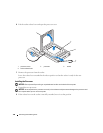
1 processor cover 2 processor 3 socket
4 socket release lever 5 socket pin-1 indicator
1
2
3
4
5