


Removing and Installing Parts 85
Removing and Installing Parts
Before You Begin
This chapter provides procedures for removing and installing the components in your computer.
Unless otherwise noted, each procedure assumes that a component can be replaced by performing
the removal procedure in reverse order.
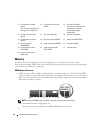
Recommended Tools
The procedures in this document may require one or more of the following tools:
• Small flat-blade screwdriver
• Phillips screwdriver
• Flash BIOS update (see the Dell support website at
support.dell.com
)
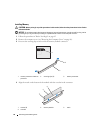
Preparing to Work Inside Your Computer
Use the following safety guidelines to help protect your computer from potential damage and to
help ensure your own personal safety.
CAUTION: Before you begin any of the procedures in this section, follow the safety instructions in the
Product Information Guide.
CAUTION: To reduce the risk of fire, electric shock, or injury, do not overload an electrical outlet, power
strip, or convenience receptacle. The total ampere rating of all products plugged into an electrical outlet,
power strip, or other receptacle should not exceed 80 percent of the branch circuit rating.
CAUTION: Your computer is heavy and can be difficult to maneuver. Seek assistance before attempting to
lift, move, or tilt the computer and always lift correctly to avoid injury; avoid bending over while lifting.
NOTICE: Only a certified service technician should perform repairs on your computer. Damage due to
servicing that is not authorized by Dell is not covered by your warranty.
NOTICE: To avoid electrostatic discharge and damage to internal components, ground yourself by using a
wrist grounding strap or by periodically touching an unpainted metal surface on the computer chassis.
NOTICE: Handle components and cards with care. Do not touch the components or contacts on a card.
Instead, hold a card by its edges or by its metal mounting bracket. Hold a component such as a
microprocessor by its edges, not by its pins.