154 Removing and Installing Parts
Installing the Power Supply
1
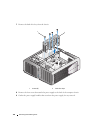
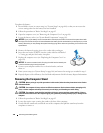
Slide the power supply into place, ensuring that the tabs on the rear wall of the computer chassis latch
into place.
2
Replace the four screws that secure the power supply to the back of the computer chassis.
3
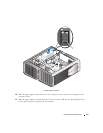
Replace the two hard drive bays.
4
Replace all hard drives installed in the interior hard drive bays (see "Installing a Hard Drive" on
page 110).
5
Replace the optional hard drive fan, if applicable (see "Installing the Optional Hard Drive Fan" on
page 138).
6
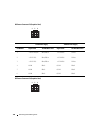
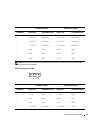
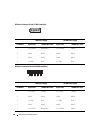
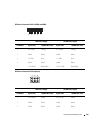
Reattach each of the DC power cables that were previously connected, carefully rerouting them as you
found them.
7
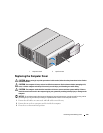
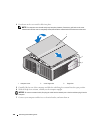
Replace the computer cover (see "Replacing the Computer Cover" on page 159).
NOTICE: To connect a network cable, first plug the cable into the network port or device and then plug it into the
computer.
8
Connect your computer and devices to electrical outlets, and then turn them on.


