


1-57
Setting Up the Printer | 57
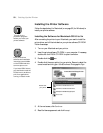
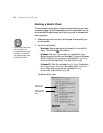
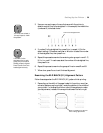
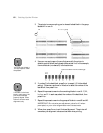
Aligning the Print Head
Before using the printer, you should align the print head to ensure clean,
accurate printouts. To do the alignment, you have to print a set of alignment
patterns. Make sure you’ve run a nozzle check, as described on page 54,
before you begin. If the print head nozzles are clogged, the patterns won’t
print correctly and your print head alignment won’t be accurate.
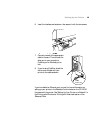
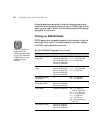
1. Make sure the printer is turned on, then load roll paper that is at least
24 inches wide. For best results, use EPSON Doubleweight Matte paper
(this is the type of paper that came with your printer).
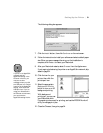
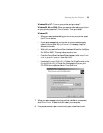
2. Press the
SelecType button on the control panel. You see PRINTER
SETUP
.
3. Press
u until you see HEAD ALIGNMENT, then press r. You see
PAPER THKNS.
4. Press
r until *STD appears on the display. This is the correct thickness
setting for most EPSON papers.
5. Press
Enter.
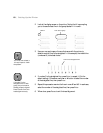
6. Press the
u or d button to select the desired alignment mode (UNI-D
ALL
, BI-D BLACK, or BI-D ALL), then press Enter to start printing the
alignment patterns. After they print, see the appropriate section on the
following pages, depending on the selected mode.
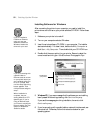
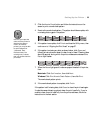
In general, you should perform all three types of alignments. If you plan
to print only unidirectionally, you may only need to adjust UNI-D
ALL. If you plan to print bidirectionally, perform the UNI-D ALL
alignment first, then BI-D BLACK, then BI-D ALL.
Caution
When performing the BI-D
alignments, always do
them in this order: UNI-D
ALL, then BI-D BLACK,
then BI-D ALL. Do not
repeat the BI-D BLACK
(K1) alignment afterward.