


Overview
Introduction
2
2-3
Introduction
Chapter 2 provides an overview of the major features of the instrument. Comprehensive
details on all instrument features are found in Chapter 3 (for front panel operation) and
Chapter 4 (for computer interface operation.)
Setting Up the Instrument
Unpacking and Inspecting the Instrument
The following items are included in the shipping container:
• This manual
• Hydra Series II Starter Software
• Hydra Series II Data Acquisition Unit (2620A) or Hydra Series II Data Logger
(2625A)
• Input Module
• Digital I/O and Alarms Connector
• Test leads
• Line cord
Carefully remove the instrument from its shipping container and inspect it for possible
damage or missing items. If the instrument is damaged or something is missing, contact
the place of purchase immediately. Save the container and packing material in case you
have to return the instrument.
Rotate the rear feet 180 degrees so that their support pads extend slightly below the
bottom of the case.
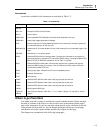
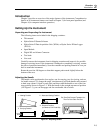
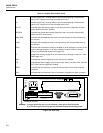
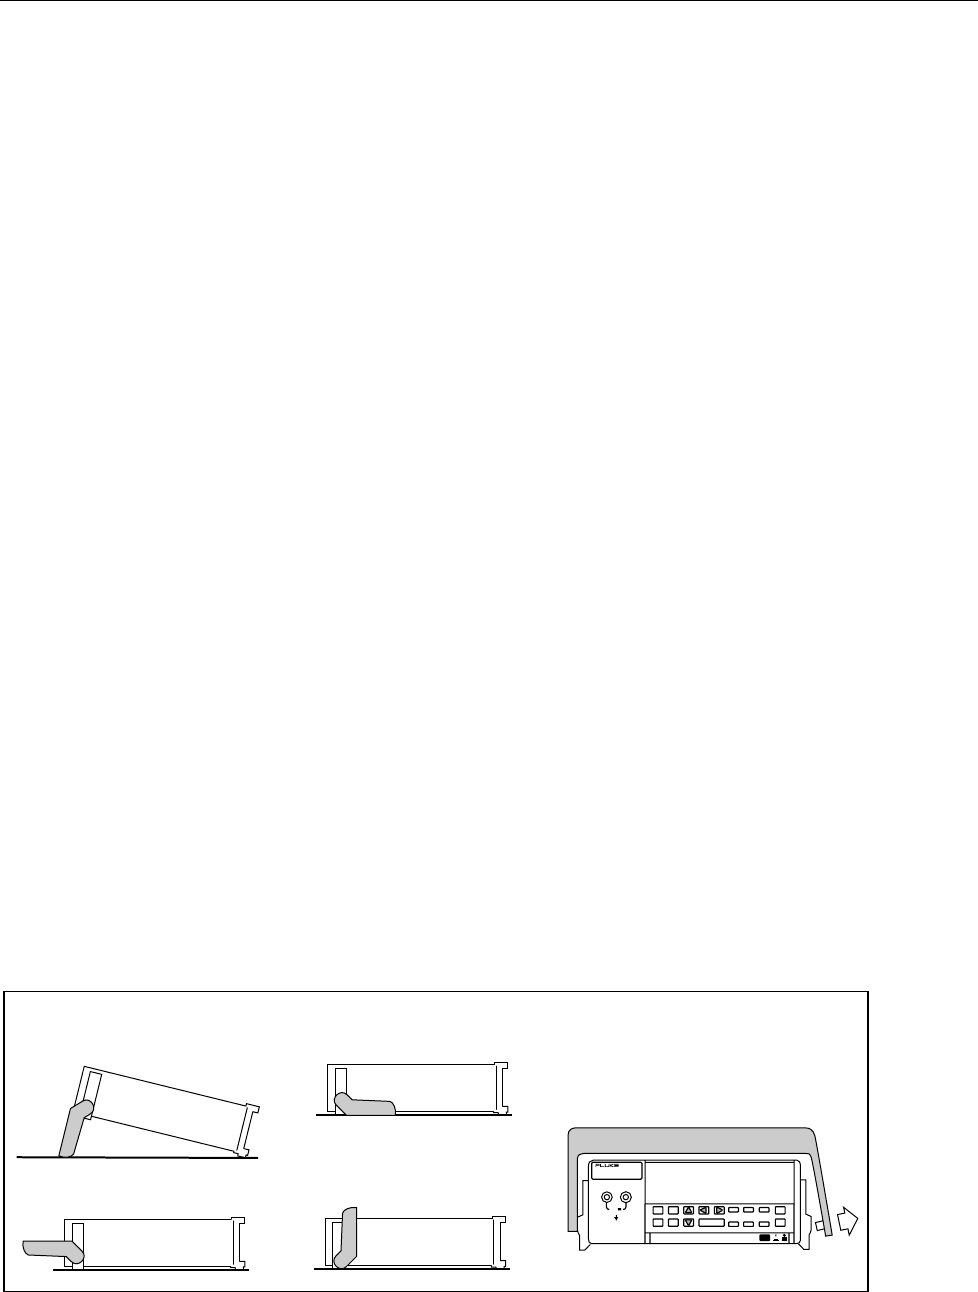
Adjusting the Handle
The handle can be positioned to four angles: one for carrying, two for viewing, and one
for handle removal. To change the angle, simultaneously pull both handle ends outward
to hard stops (about 1/4 inch on each side) and then rotate the handle to one of the four
stop positions shown in Figure 2-1. With the handle in the straight-up removal position
(4 in Figure 2-1), you can disengage and free one handle side at a time.
3. Carrying Position
1. Viewing Position
2. Alternate Viewing Position
4. Removal Position
(to Remove, Pull Ends Out)
Pull One End Out and Towards You.
Then Pull the Other End Out.
V
300V
MAX
COM
Ω
oo01f.eps
Figure 2-1. Adjusting Handle