Operating the Instrument from the Front Panel
REM Annunciator
3
3-27
G and D can now be used to change the monitored channel. All other front panel
buttons are locked out; a long beep results from their use. Press both F and B again
to deactivate the Monitor Only function and return the instrument to normal front panel
button operation (regular Monitor Function on.)
Computer Interface-Initiated Lockouts
Front Panel lockout can also be specified over the Computer Interface with the following
commands.
• REMS (RS-232 only): four front panel buttons remain active (Q, G, K, and
R).
• RWLS (RS-232 only): only the R button remains active.
• LOCK 1 J, H, G, and D can now be used to view the various elements of
the Review Array. All other front panel buttons are locked out, yielding a long beep
when pressed. Press both F and B again to deactivate the Review Only function
and return the instrument to normal front panel button operation (regular Review
Array display.)
• LOCK 2 G and H can now be used to change the monitored channel. All
other front panel buttons are locked out; a long beep results from their use.
Refer to Chapter 4 for additional information on these commands.
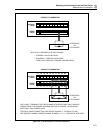
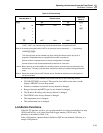
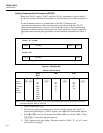
REM Annunciator
The front panel REM annunciator identifies the status of both computer interface control
and front panel lockout. REM may be lit due to actions taken from the computer
interface or the front panel; it can be off, dim, or bright as shown in Table 3-19.
Table 3-19. REM Annunciation
Remote Lock REM Annunciation
False False Off
False True Dim
True False Bright
True True Dim
Calibration
Refer to Chapter 6 (Maintenance) of this manual for a general discussion of instrument
calibration. Refer to the Hydra Series II Service Manual (P/N 688868) for complete
calibration procedures.
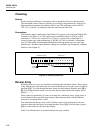
The CAL ENABLE control point is located in the lower-right corner of the display.
When the instrument is correctly calibrated, this control should be covered with a
calibration decal; removing the decal voids assurance of correct calibration.
Note
Do not press CAL ENABLE unless you have a copy of the Service Manual
and intend to calibrate the instrument. If you have accidentally activated
Calibration and wish to exit immediately, press CAL ENABLE (until CAL
disappears from the display) or turn power OFF.


