Operating the Instrument from the Front Panel
Measurement Connections
3
3-17
Setting Date and Time of Day
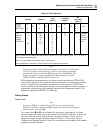
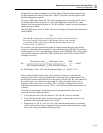
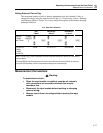
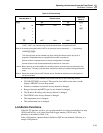
The instrument features a built-in, battery-maintained clock and calendar. Verify or
change the settings using the steps shown in Table 3-13. If necessary, refer to "Entering
and Changing Numeric Values" for a more detailed description of the number changing
technique used here.
3-13. Date/Time Selection
Year
“YEAR”
Month.Day
“Mn.dY”
Hour.Minut
e” Hr.nn”
PRESS
THESE
BUTTONS:
CLOCK
(
KI
])
G
D
H
J
E
G
D
H
J
E
G
D
H
J
E
TO SELECT
FROM
THESE
CHOICES:
00-99 01-12.01-31 00-23.00-59
Note: The last
E
press completes clock and calendar setting and returns the instrument to
Inactive Mode.
Pressing
C
during this sequence also returns the instrument to Inactive Mode; all entries to
this point are discarded, and the clock/calendar settings are left unchanged.
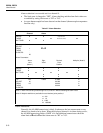
Measurement Connections
Warning
To avoid electric shock:
• When the input module is installed, consider all channels
with connections as accessible terminals that may be
hazardous live.
• Disconnect the input module before touching or changing
external wiring.
• Remove inputs from live voltages before opening the input
module.


