


Three
Using Your LifeBook C Series
LifeBook C Series from Fujitsu
31
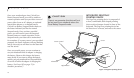
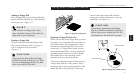
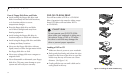
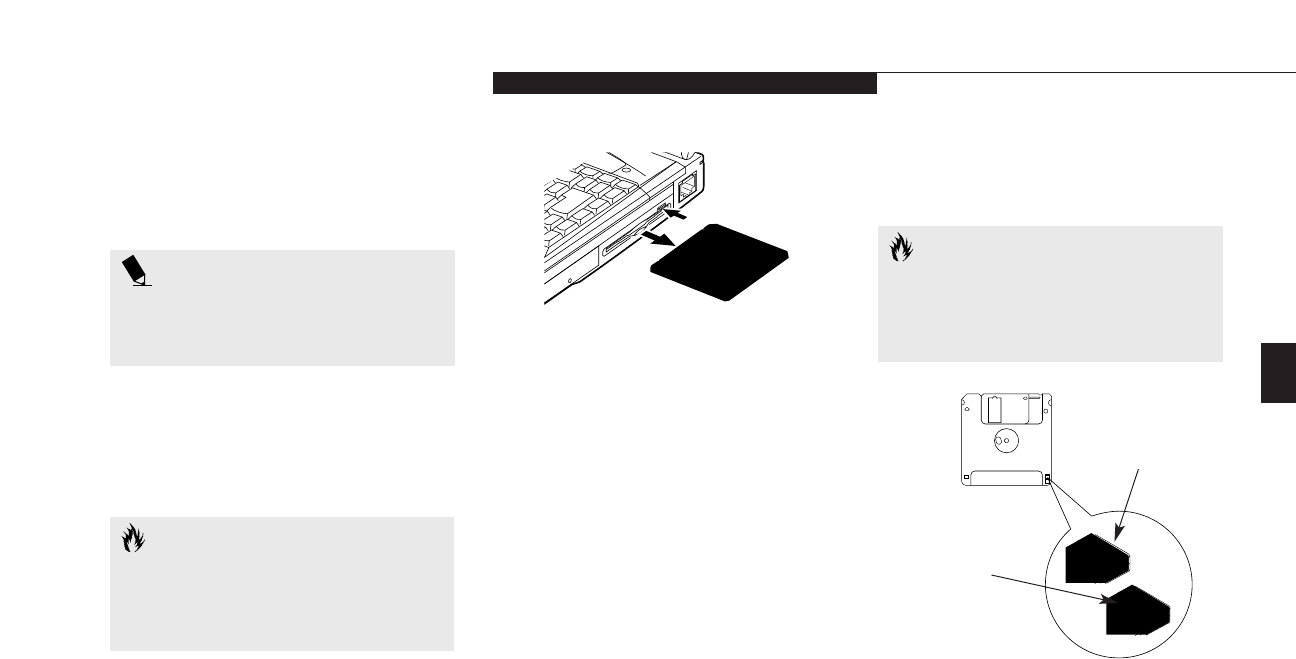
Loading a Floppy Disk
Insert a floppy disk into the floppy disk drive –
shutter side first and label up – until the Eject
button pops out. (Figure 3-7.)
CAUTION
If you eject the disk while the Floppy
Disk Drive Access indicator is On, there
is a risk of damaging the disk, the disk
drive or the data on the disk.
Preparing a Floppy Disk for Use
Before you can use a new floppy disk, you need
to prepare it so your notebook knows where to
store information. This preparation is called
formatting or initializing a disk. You need to
format new 3.5" floppy disks, unless you pur-
chase preformatted disks. Use your notebook’s
operating system software to format a floppy
disk. Please refer to the operating system
manual for step-by-step instructions.
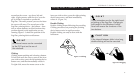
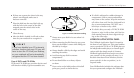
To prevent accidental erasure of data stored on
a floppy disk, slide the "write protect" tab on
the floppy disk to open up the small hole. This
makes the disk "write protected." When you
want to write data to that disk, slide the
write protect tab the other way to close the
small hole. (See Figure 3-8.)
CAUTION
Formatting a previously used floppy
disk is an effective method of clearing a
disk as long as you realize that ALL the
information on the disk will be erased.
POINT
When there is no floppy disk in the
drive, the Eject button is flush with the
right-side of your notebook.
Ejecting a Floppy Disk
To eject a disk, check that the Floppy Disk
Drive Access indicator is Off, (see pages 20
and 23) and press the Eject button.
(Figure 3-7.)
Figure 3-7 Ejecting a Floppy Disk
Figure 3-8 Floppy Disk Write Protect
Write Enabled
Write Protected