


Q2431-90912 Chapter 7 Troubleshooting 277
CONTINUED
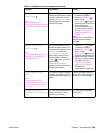
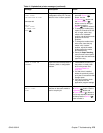
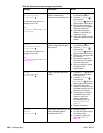
13.01.00. or 13.03.00
JAM IN TRAY X
For help press
or
13.03.00
PAPER JAM OPEN INPUT TRAYS
THEN OPEN AND CLOSE TOP COVER
CONTINUED CONTINUED
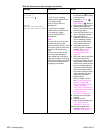
11. Verify that the top-of-page
sensor (PS103) is operating
correctly and that the sensor
flag can freely move. Replace
the sensor if it is not operating
correctly. See “Printer
switches and sensors” on
page 336.
12. Replace the
DC controller PCA. See
“DC controller PCA” on
page 181.
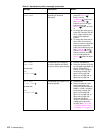
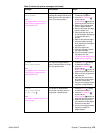
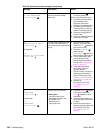
13.02.00 or 13.05.00 or
13.20.00 or 13.21.00
JAM IN TOP
COVER AREA
For help press
A jam exists in the top-cover area.
A 13.02.00 error message
indicates that the media did not
pass the top-of-page
sensor (PS103) within the
specified time.
A 13.05.00 error message
indicates that the media did not
arrive at the fuser delivery
sensor (PS108) within the
specified time.
A 13.20.00 error message
indicates that the printer power
was turned on or that the printer
attempted to initialize while the
pre-feed sensor (PS102), the top
of page sensor (PS102) and/or
the fuser delivery sensor (PS108)
was detecting media.
A 13.21.00 error message
indicates that the top cover open
switch (SW101) was activated
while a print job was printing (the
top cover was opened or the
switch is defective).
1. Press the H
ELP ( ) button
for detailed information about
clearing the jam.
2. Press the U
P ARROW ()
button and the
D
OWN ARROW ( ) button to
step through the instructions.
3. Check the pre-feed,
top-of-page, and fuser
assembly sensors (PS102,
PS103 and PS 108) and
verify that the sensor arms
move freely. (sSe “Location
of printer switches and
sensors” on page 336.)
4. If the paper-feed assembly
has been replaced, verify that
the pre-feed sensor (PS102)
is installed correctly. See
“Correctly install the
paper-feed assembly sensor
flag” on page 197.
5. Replace the top-of-page
sensor (PS103). See
“Location of printer switches
and sensors” on page 336.
6. Replace the top-cover-open
switch (SW101). See
“Location of printer switches
and sensors” on page 336.
7. Replace the fuser (PS108).
See “Fuser” on page 162.
8. Replace the
DC controller PCA. See
“DC controller PCA” on
page 181.
9. If this error message appears
frequently, see “Paper-path
troubleshooting” on
page 295.
Table 42. Numerical printer messages (continued)
Message Description Action