Installing options 47
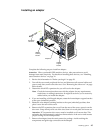
2. Connect the SCSI signal cable to the adapter and one or more of the signal cable
connectors to the rear of the SCSI devices.
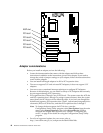
3. Connect the SCSI activity indicator cable to the adapter and to the SCSI LED
connector (J3) on the system board. See “System board internal cable connectors”
on page 36 for the location of this connector.
Note: If you are installing a ServeRAID adapter and already have a SCSI adapter
installed, remove the SCSI adapter and store it for future use.
4. If you have other adapters or options to install or remove, do so now.
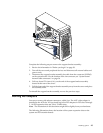
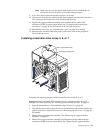
5. Rotate the front adapter support bracket to the closed (locked) position.
6. Reinstall the rear adapter retaining bracket; then, rotate the bracket to the closed
(locked) position.
7. Reinstall the side cover, see “Installing the cover” on page 59 for details.
8. Reconnect the external cables and power cords; then, turn on the peripheral
devices and the server.
Installing internal drives
Different types of drives enable your server to read multiple types of media and store
data in different formats. Depending on your server model, you might have one or
more of the following drives installed.
• Diskette
• Hard disk
• CD-ROM
• Tape
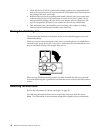
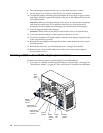
Internal drive bays
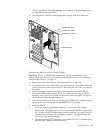
Your server comes with an IDE CD-ROM drive installed in bay 1, a 3.5-in., 1.44 MB
diskette drive in bay 3, and a hard disk drive in bay 5. For instructions on installing
drives in bays 1 and 3, see “CD-ROM drive” on page 76 and “Floppy disk drive” on
page 77.
Note: The illustrations in this document might differ slightly from your hardware.


