Hardware Installations and Upgrades
34
Installing a Floppy Drive into Slimline Bay
Use these instructions if you are installing a floppy drive into the slimline drive bay at the upper left
side of your chassis.
✏ NOTE
The carrier for the slimline floppy drive that is used in these instructions was
sent to you in the hardware kit that came with your Server Chassis SR1450.
1. Observe the safety and ESD precautions at the beginning of this book. See “Safety
Information.”
2. Power down the server and unplug all peripheral devices and the AC power cable(s).
3. Remove the chassis cover. For instructions, see “Removing the Chassis Cover.”
4. Remove the front bezel if it is installed. For instructions, see “Removing and Installing the
Front Bezel.”
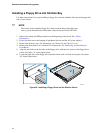
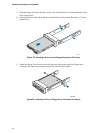
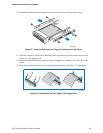
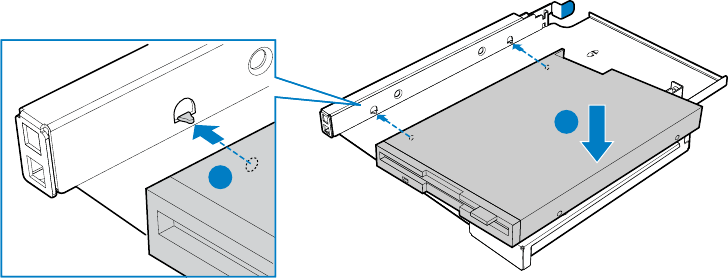
5. Align the two holes at the left side of the floppy drive with the two cutouts in the floppy drive
carrier. See letter “A” in the figure below.
6. Lower the right side of the floppy drive into the carrier until it is flush and in place. See letter
“B” in the figure below.
TP01603
B
A
Figure 20. Installing a Floppy Drive into the Slimline Carrier


