


DLA-G150CLU
DLA-G150CLE
1-29
No.51931
57
ENGLISHDEUTSHFRANÇAISITALIANOESPAÑOL
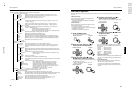
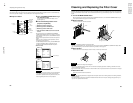
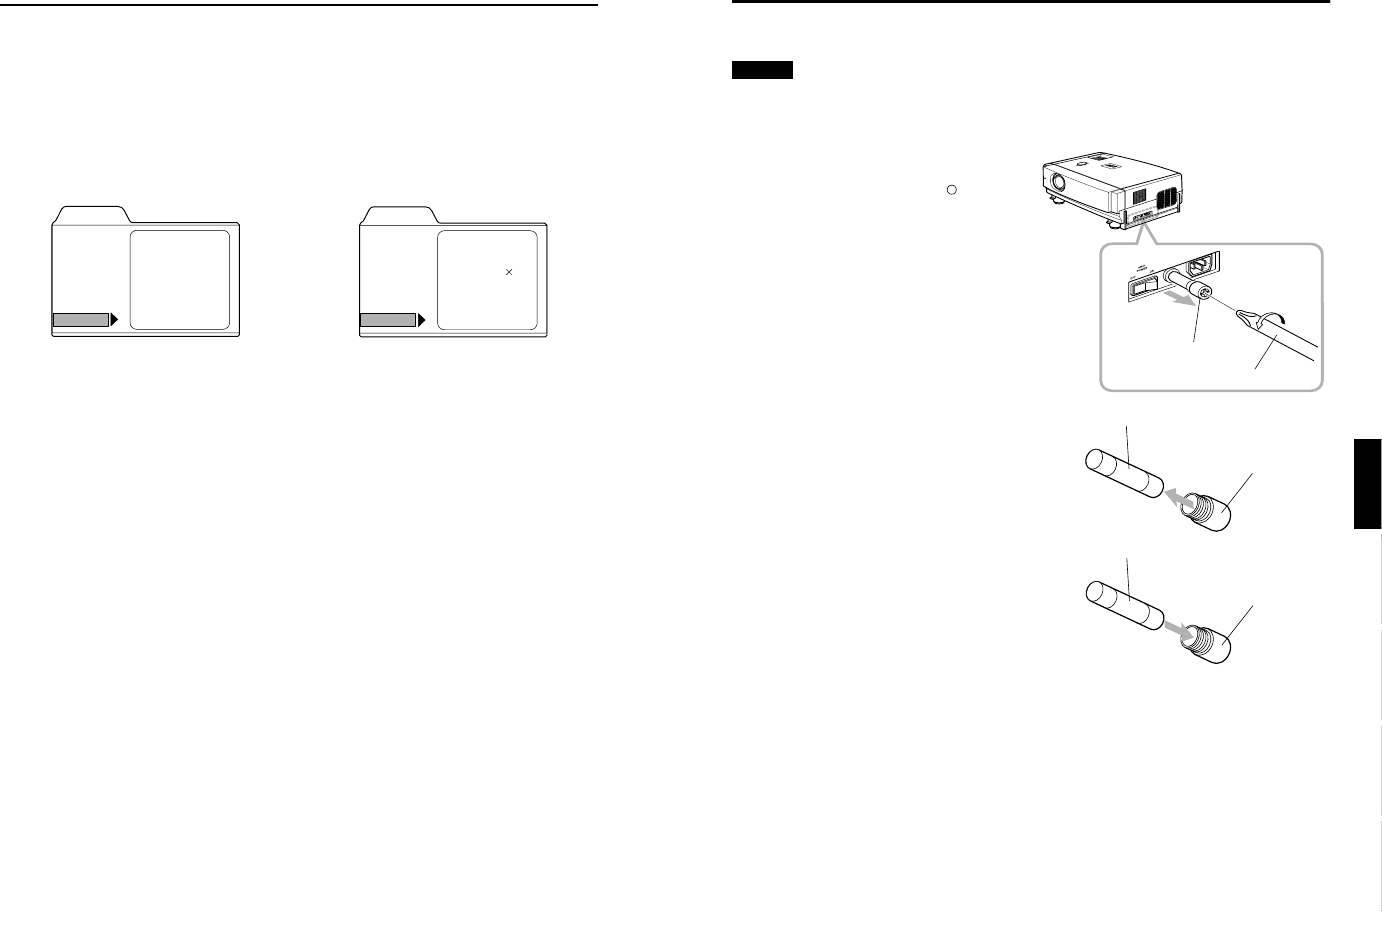
Replacing the Fuse
A fuse is used to protect the power source of the projector. If the fuse is blown, replace it. When the power switch is turned on
but no power is supplied to the projector, check the fuse. If there are any unclear points, contact the dealer where you
purchased your projector, or consult the Service center.
CAUTION
• When replacing the fuse, use the same rating and type (12 A 250 V). Otherwise, a fire may occur and/or the projector may
be damaged.
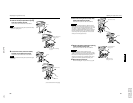
1
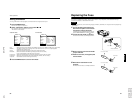
Turn off the main power switch and
disconnect the power cord from both
the projector and the wall outlet.
In stand-by state (the STAND BY indicator lights on),
place the MAIN POWER switch of OFF [ ] position.
2
Loosen the fuse holder to remove it.
To loosen the fuse holder, use a Phillips screwdriver.
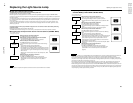
3
Remove the fuse from the fuse holder
you just removed.
4
Install the new fuse (not supplied) into
the fuse holder.
5
Reinstall the fuse holder into the
projector.
To reinstall the fuse holder, use a Phillips screwdriver.
Fuse holder
Phillips screwdriver
Fuse holder
Fuse (12 A, 250 V)
Fuse holder
Fuse (12 A, 250 V)
56
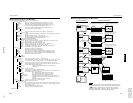
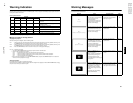
Menu Operations
Getting Information
You can get information on the input signal, accumulated used hours of light-source lamp, etc.
1
Press the MENU button.
The main menu appears on the screen.
2
Select “Information” with the cursor button 5
55
5 or ∞
∞∞
∞.
The “Information” will be displayed in the main menu.
*No submenu can be selected.
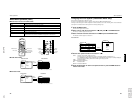
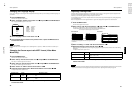
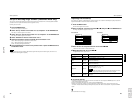
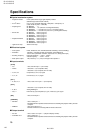
Video main menu PC main menu
Input: Shows the terminal name selected by the VIDEO or PC button. (Y/C, VIDEO or COMP, or PC1, PC2 or DVI)
Switcher: This display currently has no meaning. This is reserved for future use. (“CH.0” is usually displayed to
indicate that it is not being used.)
Source: Shows the projected image’s type of video signal. (Video menu mode)
Resolution: Shows the resolution of the video signal being received. (PC menu mode)
It may not be displayed correctly with some input signals.
Frequency H: Shows the horizontal frequency of the video signal being received. (PC menu mode)
Frequency V: Shows the vertical frequency of the video signal being received. (PC menu mode)
Lamp time: Accumulated used hours of the light-source lamp.
3
Press the MENU button to exit the menu mode.
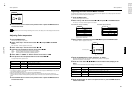
Menu
Image adj.
Setting
Color temp.
Options
Language
Information
Input
Switcher
Source
Lamp time
VIDEO
CH.0
NTSC
123 h
Menu
Input
Switcher
Resolution
Frequency H
Frequency V
Lamp time
PC 1
CH.0
1280 1024
79.9
75
123
kHz
Hz
h
Image adj.
Setting
Color temp.
Options
Language
Information