


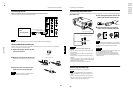
DLA-G150CLU
DLA-G150CLE
1-64
No.51931
46
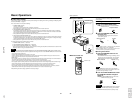
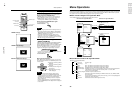
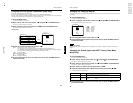
Menu Operations
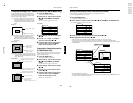
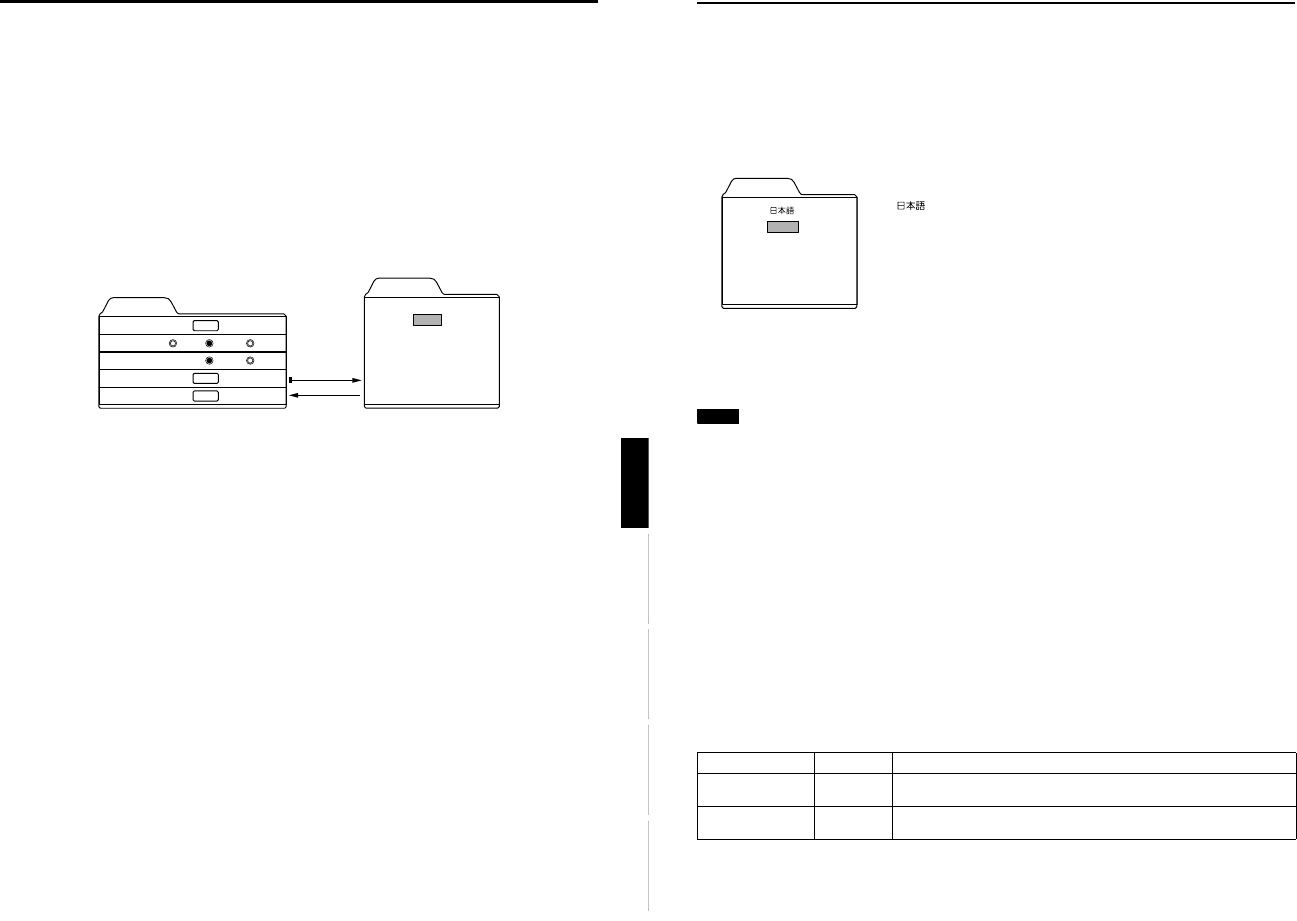
Changing the Language Display
The on-screen language is set to “English” when shipped from the factory. When you want to change to another language, set
it as follows.
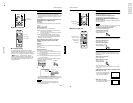
1
Press the MENU button.
The main menu appears on the screen.
2
Select “Language” with the cursor button 5 or ∞
∞∞
∞, and press 3
33
3 or the ENTER button.
The “Language” submenu appears on the screen.
3
Set the language with the cursor button 5 or ∞
∞∞
∞.
4
Press the EXIT button to return to the previous menu or press the MENU button to
exit the menu mode.
Memo
About language display
Some words in the menu and messages such as “Quick Alignment”, “Keystone”, “VIDEO” and “NTSC” are shown only in
English.
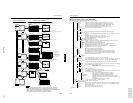
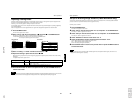
Changing the Screen aspect ratio/HDTV format (Video Menu
Mode Only)
1
Press the MENU button.
The main menu appears on the screen.
2
Select “Set up” with the cursor button 5 or ∞
∞∞
∞, and press 3
33
3 or the ENTER button.
The “Set up 1” submenu appears on the screen.
3
Select “Set up 2” with the cursor button 5 or ∞
∞∞
∞, and press 3
33
3 or the ENTER button.
The “Set up 2” submenu appears on the screen.
4
Select “Screen” or “HDTV” with the cursor button 5 or ∞
∞∞
∞.
5
Adjust the Screen aspect ratio or HDTV format with the cursor button 2
22
2 or 3
33
3.
To adjust multiple items, repeat 4 and 5.
6
Press the EXIT button to return to the previous menu or press the MENU button to
exit the menu mode.
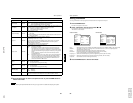
Adjustment item Button Adjustment content
Screen 2 or 3
Select according to the aspect ratio of the screen used.
4:3 16:9
HDTV 2 or 3
Set the number of effective scanning lines. Normally, select 1080i.
1080i: 1035i:
Language
English
Deutsch
Español
Italiano
Français
: Japanese
English : English
Deutsch : German
Español : Spanish
Italiano : Italian
Français : French
45
Menu Operations
ENGLISHDEUTSHFRANÇAISITALIANOESPAÑOL
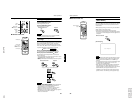
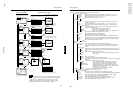
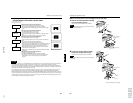
Changing the Color System (Video Menu Mode Only)
This function is available only in Video menu mode.
The menu is only displayed when there is a signal for the AV IN (Y/C, VIDEO and COMP) terminal.
Normally, use the color system in AUTO. If operation in AUTO is unstable, such as color not being shown, set to a dedicated
color system in accordance with the color system of the video signal being input.
1
Press the MENU button.
The main menu appears on the screen.
2
Select “Set up” with the cursor button 5 or ∞
∞∞
∞, and press 3
33
3 or the ENTER button.
The “Set up 1” submenu appears on the screen.
3
Select “Decoder” with the cursor button 5 or ∞
∞∞
∞, and press the ENTER button.
The “Decoder” submenu appears on the screen.
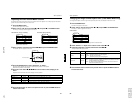
Video submenus
4 Set the color system with the cursor button 5 or ∞
∞∞
∞.
AUTO: Normally, set to “AUTO”. (Factory set value)
The color system of a video signal being input is automatically identified and displayed in [ ].
In [ ], B/W (Black & White), NTSC, NTSC4.43, PAL or SECAM will be displayed. (It is not always displayed.)
For example, AUTO [ NTSC ] shows that the NTSC signal is being received.
NTSC: Dedicated to NTSC.
NTSC4.43:Dedicated to NTSC4.43.
PAL: Dedicated to PAL.
SECAM: Dedicated to SECAM.
5
Press the EXIT button to return to the previous menu or press the MENU button to
exit the menu mode.
Set up 1
Position
Gamma
Aspect ratio
Decoder
Page 2
ENTER
ENTER
ENTER
Decoder
AUTO [ NTSC ]
NTSC
NTSC4.43
PA L
SECAM
Cinema
4:3
Down
Up
16:9
ENTER
EXIT