


DLA-G150CLU
DLA-G150CLE
1-3
No.51931
5
ENGLISHDEUTSHFRANÇAISITALIANOESPAÑOL
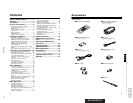
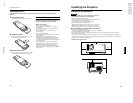
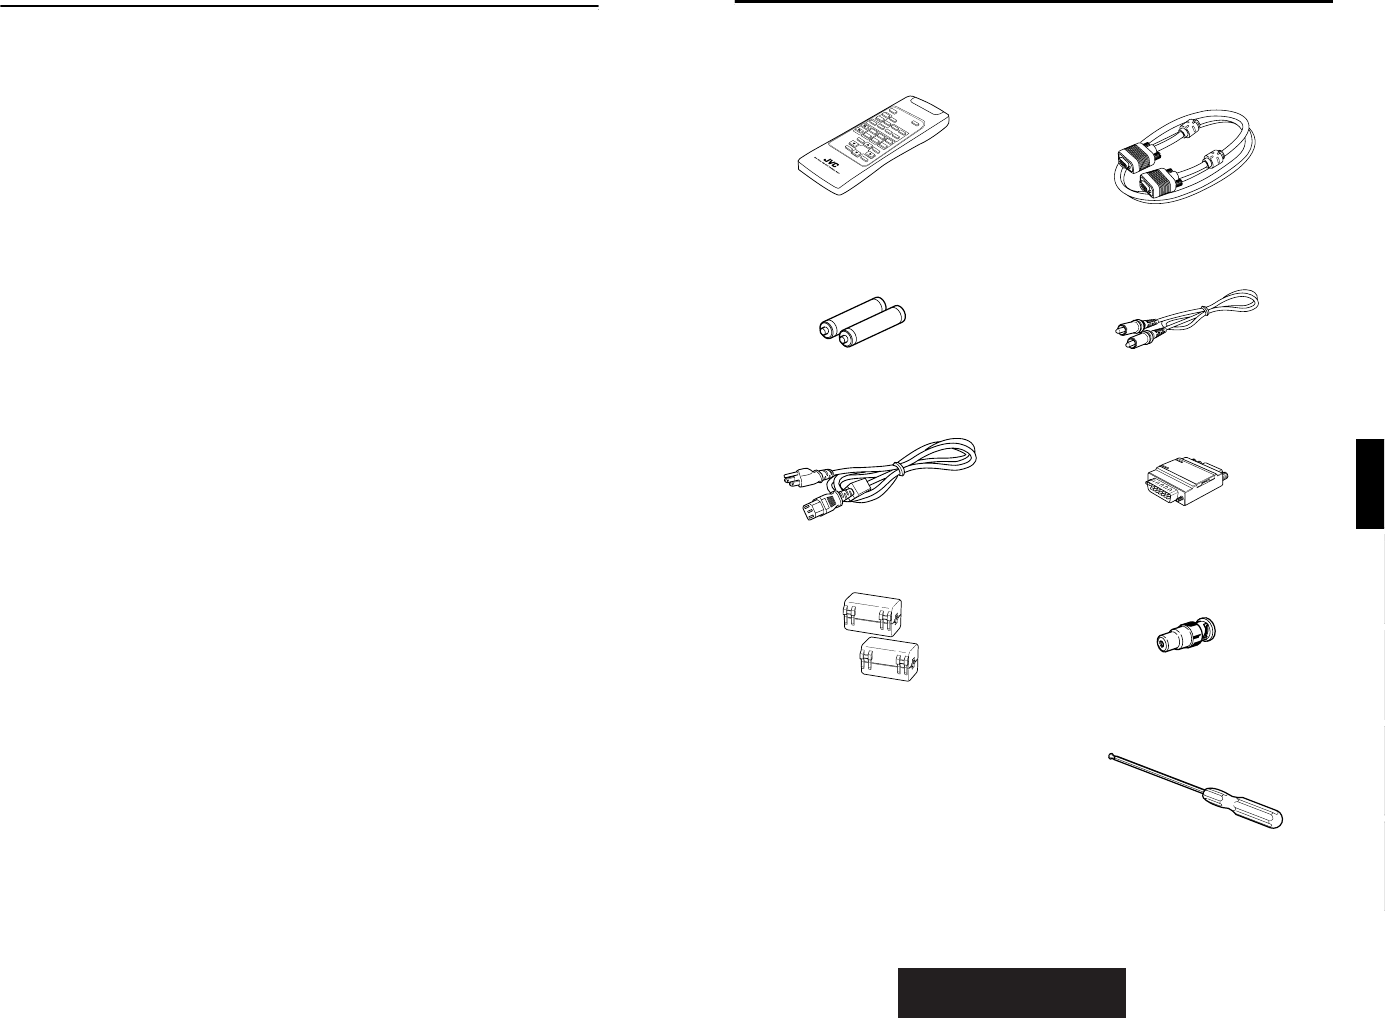
Accessories
The following accessories are included with this projector. Check for them; if any item is missing, please
contact your dealer.
■
■■
■ Remote control unit (RM-M160G)
■
■■
■ AA/R6-size dry cell battery (×
××
×2)
(for checking operation)
■
■■
■ Power cord
[approx. 8.2 ft (approx. 2.5 m)]
■
■■
■ Ferrite core (×
××
×2)
■
■■
■ Personal computer connection cable
[approx. 6.56 ft (approx. 2 m)]
(D-sub, 3-row 15 pin)
■
■■
■ Video cable
[approx. 6.56 ft (approx. 2 m)]
■
■■
■ Conversion adapter for Mac
(for Macintosh)
■
■■
■ BNC-RCA Conversion plug
■
■■
■ Hex. wrench
4
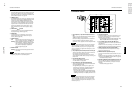
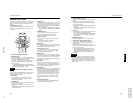
Contents
SAFETY PRECAUTIONS ................. 2
Contents........................................... 4
Accessories ..................................... 5
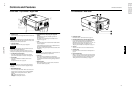
Controls and Features .................... 6
Front Side / Top Surface / Right Side .....................6
Left-hand Side / Rear Side......................................7
Bottom Surface .......................................................8
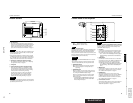
Control Panel on the Projector................................9
Connector Panel ...................................................11
Remote Control Unit..............................................12
Installing Batteries.................................................14
Precautions for using batteries..............................14
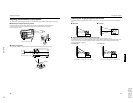
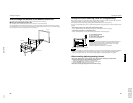
Installing the Projector.................. 15
Precautions for Installation....................................15
Adjusting the Inclination of the Projector...............16
Installing the Projector against the Screen............17
Projection Distance and Screen Size....................18
Setting the Amount of Lens Shifting......................19
Effective Range and Distance of the
Remote Control Unit..............................................20
Setting the Position Selecting Screw for Ceiling
Mounting ...............................................................21
When installing (adjusting/setting) the unit............21
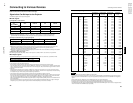
Connecting to Various Devices.... 22
Signals that Can Be Input to the Projector............22
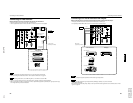
Connecting to Video Devices................................24
Connecting to Hi-Vision Devices/DVD Players .....25
Connecting to Other Devices ................................26
Connecting to Devices which Control the
Projector................................................................27
Connecting to Computer Devices .........................28
Connecting to DVI.................................................29
How to attach the ferrite core................................29
Connecting the Power Cord..................................30
Removing the Lens Cap........................................30
Basic Operations........................... 31
1. Turning on the Power........................................32
2. Select the Input source to be Projected............33
3. Adjust the Screen Size (Zooming) ....................34
4. Adjust Focus .....................................................34
5. Setting the Screen Aspect Ratio.......................34
Turning off Image (HIDE)......................................35
Removing the Trapezoidal Distortion of the
Image....................................................................35
Quick Alignment Function (QUICK ALIGN.)..........36
Displaying a Still Picture (FREEZE)......................37
Zooming a Part of the Image
(DIGITAL ZOOM T/W) ..........................................37
Menu Operations ........................... 38
Basic Menu Operation...........................................43
Changing the Color System
(Video Menu Mode Only)......................................45
Changing the Language Display...........................46
Changing the Screen aspect ratio/HDTV format
(Video Menu Mode Only)......................................46
Adjusting Tracking/Phase .....................................47
Setting for Watching Image Software
(Video Menu Mode Only) ..................................... 48
Adjusting Picture Quality...................................... 49
Adjusting Color temperature................................. 50
Adjusting the Video Screen/Menu Position.......... 51
Changing the Image Gamma/Aspect Ratio
(Video Menu Mode Only) ..................................... 52
Changing the Image Size - Resize Function
(PC Menu Mode Only).......................................... 53
Changing the Clamp pulse position
(PC Menu Mode Only).......................................... 53
Setting and Adjusting Other Functions
(OPTIONS)........................................................... 54
Getting Information............................................... 56
Replacing the Fuse........................57
Replacing the Light-Source
Lamp ...............................................58
Cleaning and Replacing the
Filter Cover.....................................63
Troubleshooting.............................64
Warning Indication.........................66
Warning Messages ........................67
Specifications.................................70
Outside dimensions.............................................. 72
Pin assignment (Specifications for terminals) ...... 73
RS-232C external control ..............74
Appendix.........................................76
DLA-G150CLU