DLA-G150CLU
DLA-G150CLE
1-58
No.51931
34
Basic Operations
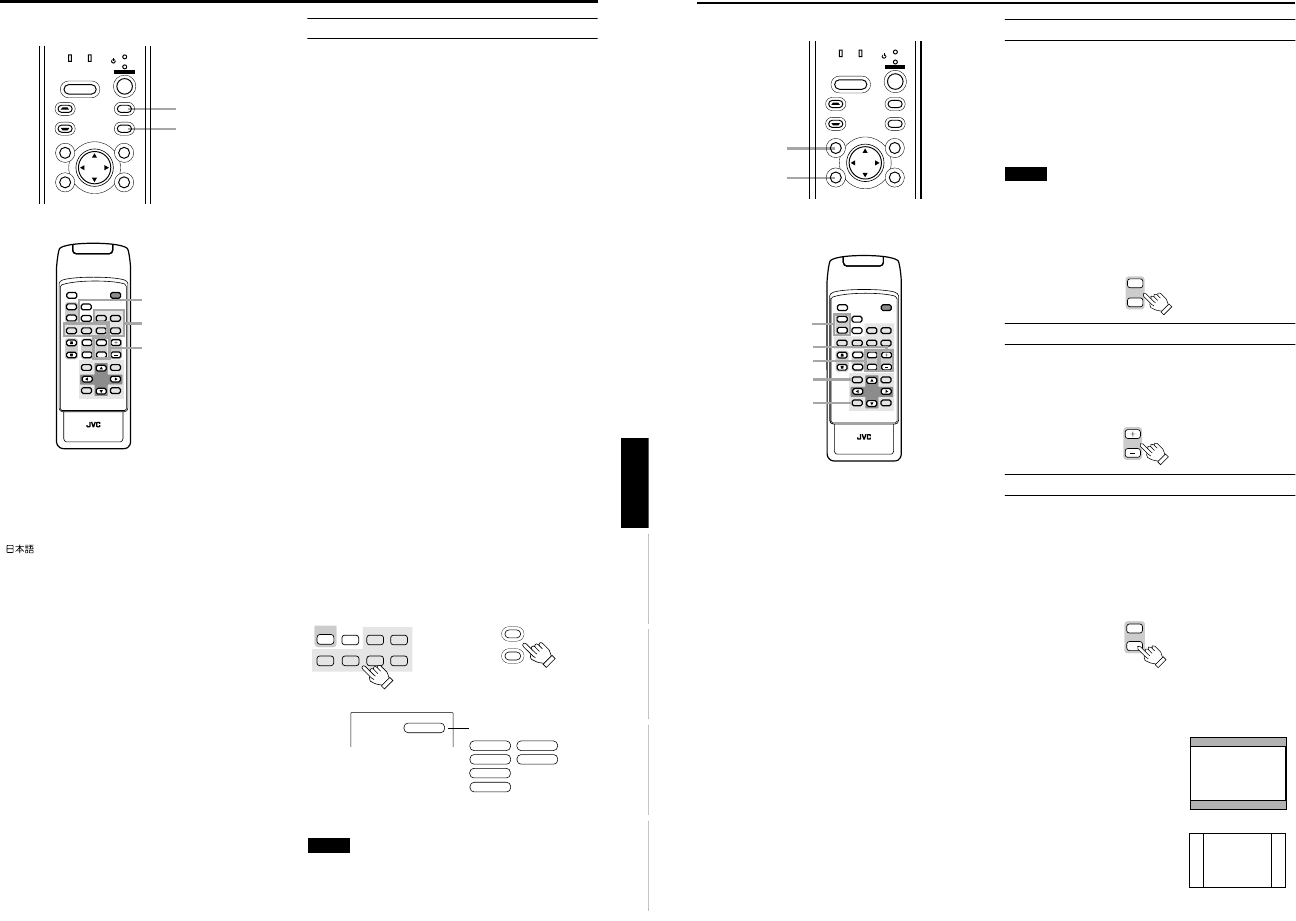
■ Projector’s buttons
■ Remote control unit
3. Adjust the Screen Size (Zooming)
How to adjust the projected screen size differs depending on
the lens unit (optional) you are using.
GL-M2910G (without zooming function):
The projected screen size cannot be changed.
GL-M2915SG/GL-M2920ZG/GL-M2930SZG (with
zooming function):
Adjust the projected screen size with the following buttons on
the remote control unit.
Note
• The function of GL-M2915SG is to adjust the view angle
zooming by 2%. (For fine view angle adjustment)
To enlarge the projected screen size
Press the ZOOM W (Wide) button.
To reduce the screen size
Press the ZOOM T (Tele) button.
4. Adjust Focus
Adjust focus with the following buttons on the remote control unit.
To focus on farther points:
Press the FOCUS + button.
To focus on nearer points:
Press the FOCUS – button.
5. Setting the Screen Aspect Ratio
Set in accordance with the screen aspect ratio that will be
used. When a screen aspect ratio of 16:9 is used, a 4:3
image can be projected within the screen without using the
zoom function.
When using a 16:9 screen:
Press the “W” button.
When using a 4:3 screen:
Press the “S” button.
* There is no button on the unit.
* This setting can also be performed from the menu. (Refer
to page 46.)
• When using a screen with a 16:9 aspect ratio
When set to “S” (4:3)
* If a 4:3 image is projected, some
parts of the top and bottom of the
image may not be displayed.
When set to “W” (16:9)
* A 4:3 image will be displayed in full
in the middle of the screen.
LAMP TEMP
STAND BY
HIDE
PC
VIDEO
MENU
KEYSTONE
PRESET
EXIT ENTER
OPERATE
PRESET button
EXIT button
QUICK
ALIGN.
PC1 PC2
Y/C
DVI
VIDEO
COMP
HIDE
PRESET
ENTEREXIT
MENU
FREEZE
SCREEN
OPERATE
DIGITAL
ZOOM
ZOOM FOCUS
W
W
S
T
W
T
RM-M160 REMOTE CONTROL UNIT
SCREEN
KEYSTONE
W
S
PRESET button
EXIT button
SCREEN W/S button
FOCUS +/– button
ZOOM T/W button
DIGITAL
ZOOM
W
T
Remote control unit
FOCUS
Remote control unit
Remote control unit
SCREEN
W
S
SCREEN
W
S
33
Basic Operations
ENGLISHDEUTSHFRANÇAISITALIANOESPAÑOL
■ Projector’s buttons
■ Remote control unit
■ Language display
The display languages of the menus, direct buttons
(DIGITAL ZOOM, KEYSTONE, etc) and messages is set to
“ENGLISH” when the projector is bought. The display
language can be selected from the following 6 languages:
“ (Japanese)”, “English (English)”, “Deutsch
(German)”, “Español (Spanish)”, “Italiano (Italian)” and
“Français (French)”. (Refer to page 46.) However, some
words (VIDEO, NTSC, Quick Alignment, etc) are only
displayed in English.
2. Select the Input source to be Projected
Press the VIDEO button or the PC button to switch the input.
• Each time you press either button, the selected input
changes as follows. The selected name appears on the top
right of the image on the screen for five seconds. (Called
line display.)
When selecting an image device connected to the
AV IN (VIDEO, Y/C or COMP) terminal:
Projector
Press VIDEO.
The input mode changes as follows every time the button is
pressed.
VIDEO ↔ Y/C ↔ COMP
Remote control unit
Press the “VIDEO”, “Y/C” or “COMP” button.
VIDEO: The image from the VIDEO input terminal on the
side of the unit is projected.
Y/C: The image from the Y/C input terminal on the side of
the unit is projected.
COMP: The image from the COMP (Y, R
B
/B-Y, P
R
/R-Y)
input terminal on the side of the unit is projected.
* When there is no signal from the selected input terminal
(No signal), “No Input” is displayed.
When selecting a device such as a computer
which is connected to the PC1, PC2 or DVI
terminal:
Projector
Press PC.
The input mode changes as follows every time the button is
pressed.
PC1 ↔ PC2 ↔ DVI
Remote control unit
Press the “PC1”, “PC2” or “DVI” button.
PC1: The image from the PC1 input terminal on the side of
the unit is projected.
PC2: The image from the PC2 input terminal on the side of
the unit is projected.
DVI: The image from the DVI input terminal on the side of
the unit is projected.
* When there is no signal from the selected input terminal
(No signal), “No Input” is displayed.
[Screen display]
* To show the line display (Y/C, VIDEO, COMP, PC1, PC2 or
DVI) or not is selectable by the menu. Refer to “Setting and
Adjusting Other Functions (OPTIONS)” on page 54.
Note
• When no image signal is input to the selected input
terminal, the message “No Input” is displayed on the
screen. (Refer to page 67.)
LAMP TEMP
STAND BY
HIDE
PC
VIDEO
MENU
KEYSTONE
PRESET
EXIT ENTER
OPERATE
PC button
VIDEO button
DVI
VIDEO
COMP
QUICK
ALIGN.
PC1 PC2
Y/C
HIDE
PRESET
ENTEREXIT
MENU
FREEZE
SCREEN
OPERATE
DIGITAL
ZOOM
ZOOM FOCUS
W
W
S
T
W
T
RM-M160 REMOTE CONTROL UNIT
SCREEN
KEYSTONE
W
S
PC button
VIDEO button
ZOOM button
PC1 PC2
Y/C
DVI
VIDEO
COMP
FREEZE
SCREEN
S
SCREEN
S
PC
VIDEO
Remote control unit Projector
VIDEO
QUICK ALIGNMENT
PC 1
PC 2
COMP
DVI
Y/C
VIDEO
Line Display


