


KODAK 1200i WIDE-FORMAT PRINTING SYSTEM
Technical Training Guide 10
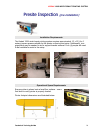
NOTE: It is suggested to assemble the right stand leg first, then attach the assembly to
the printer. Repeat with left stand leg assembly. Do not ‘completely’ tighten the screws
between stand legs and platen – only perform after the crossbar has been installed.
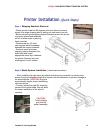
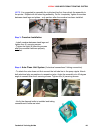
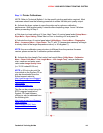
Step 3: Crossbar Installation
- Install crossbar between stand legs and
tighten four (4) securing screws.
- Tighten the eight (8) stand leg screws
after
the crossbar has been properly
installed.
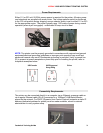
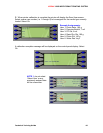
Step 4:
Auto Clean Unit System (2 electrical connections/1 tubing connection)
- To attach the auto clean unit first connect the ink tube line to the pump nipple. Attach
both electrical plug connections to respective jacks. Angle the assembly at a 45 degree
angle to connect over the 4 securing screws. Tighten four (4) securing screws.
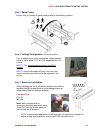
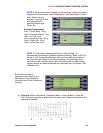
- Verify the disposal bottle is installed and tubing
connections to bottle are intact.