


KODAK 1200i WIDE-FORMAT PRINTING SYSTEM
Technical Training Guide 14
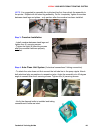
Step 11:
Printer Calibrations
NOTE: Refer to Technical Bulletin 1 for the specific printing application required. Most
customers should use the following procedure to obtain the best print quality output.
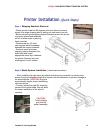
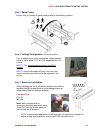
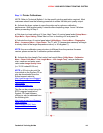
A. Activate the dryer system to warm the printer up for optimum calibration
performance. Wait approximately 5 minutes after completing steps 1a and 1b below
before proceeding to Step 2.
a) Set dryer to a heat setting of 4 (Low Heat, Fans). At control panel select
Setup Menu –
Dryer Menu - Dryer Setting.
Select Next or Prev to a setting of 4 and press Ok.
b) Activate the dryer. At control panel select
Utility Menu – Service Menu – Diagnostics
Menu – Accessory Menu – Dryer Status.
The T1 and T2 (temperature sensors) will begin
to slowly climb to the target temperature value (i.e. 40 degrees C).
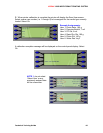
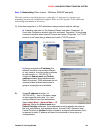
NOTE: the new calibration menu structure is different from the previous firmware
version; please review the 3 calibration paths available:
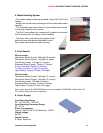
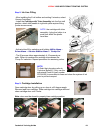
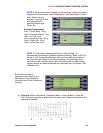
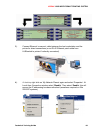
B. Activate the Line Length Test under Line Length Menu (
Utility Menu – Calibration
Menu – Paper Calib Menu - Line Length Menu – Line Length Test
), using a draftsman
ruler, measure and enter exact
value under
Image Quality Value
(i.e. 33.02 inches/83.90 cm).
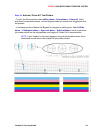
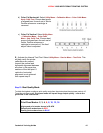
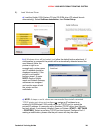
NOTE: a 35 inch ruler print file
is provided on the System CD or
may be downloaded from the
Encad support web site
http://www.encad.com/Support/
Tech-Support-Resources/RTL-
Test-Image-
Downloads/index.asp
The file can be printed using the
EFPU program supplied on
System CD (load software
utilities) or can be obtained from
the following link:
http://www.encad.com/Support/
Tech-Support-
Resources/ENCAD-Tech-
Support-Utilities/index.asp