


KODAK 1200i WIDE-FORMAT PRINTING SYSTEM
Technical Training Guide 9
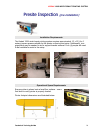
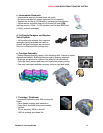
Printer Installation
(Quick Steps)
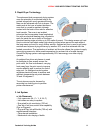
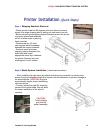
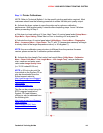
Step 1: Shipping Brackets Removal
- Rotate printer head box 90 degrees onto one side and remove
printer from large shipping box by pulling out and away from box.
- Before removing the shipping support brackets ensure the printer
is properly placed and balanced
on two or three strips of packing
foam provided.
- Remove the two (2) bolts
securing the metal crossbeam
between the support brackets.
- Remove upper and lower
shipping support brackets (four
bolts total) and install
appropriate stand leg to balance
the printer. Remove wing nut,
retaining bolt, and 4 screws.
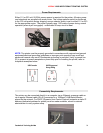
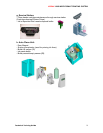
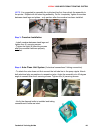
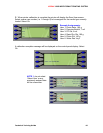
Step 2:
Media System Installation (1 electrical connection)
- When installing the right stand leg attach electrical plug connection to printer base;
ensure the plug is aligned straight and square onto the connector to prevent damage to
the electrical pins. CAUTION: plug pins
are extremely fragile; ensure restraining
clips are secure.
- ‘Loosely’ attach the eight (8) stand leg
screws to the printer base; this will allow
for proper installation of the stand’s
crossbar.
CAUTION:
Avoid pushing
plug into the
platen assembly.