10
2 Preparation
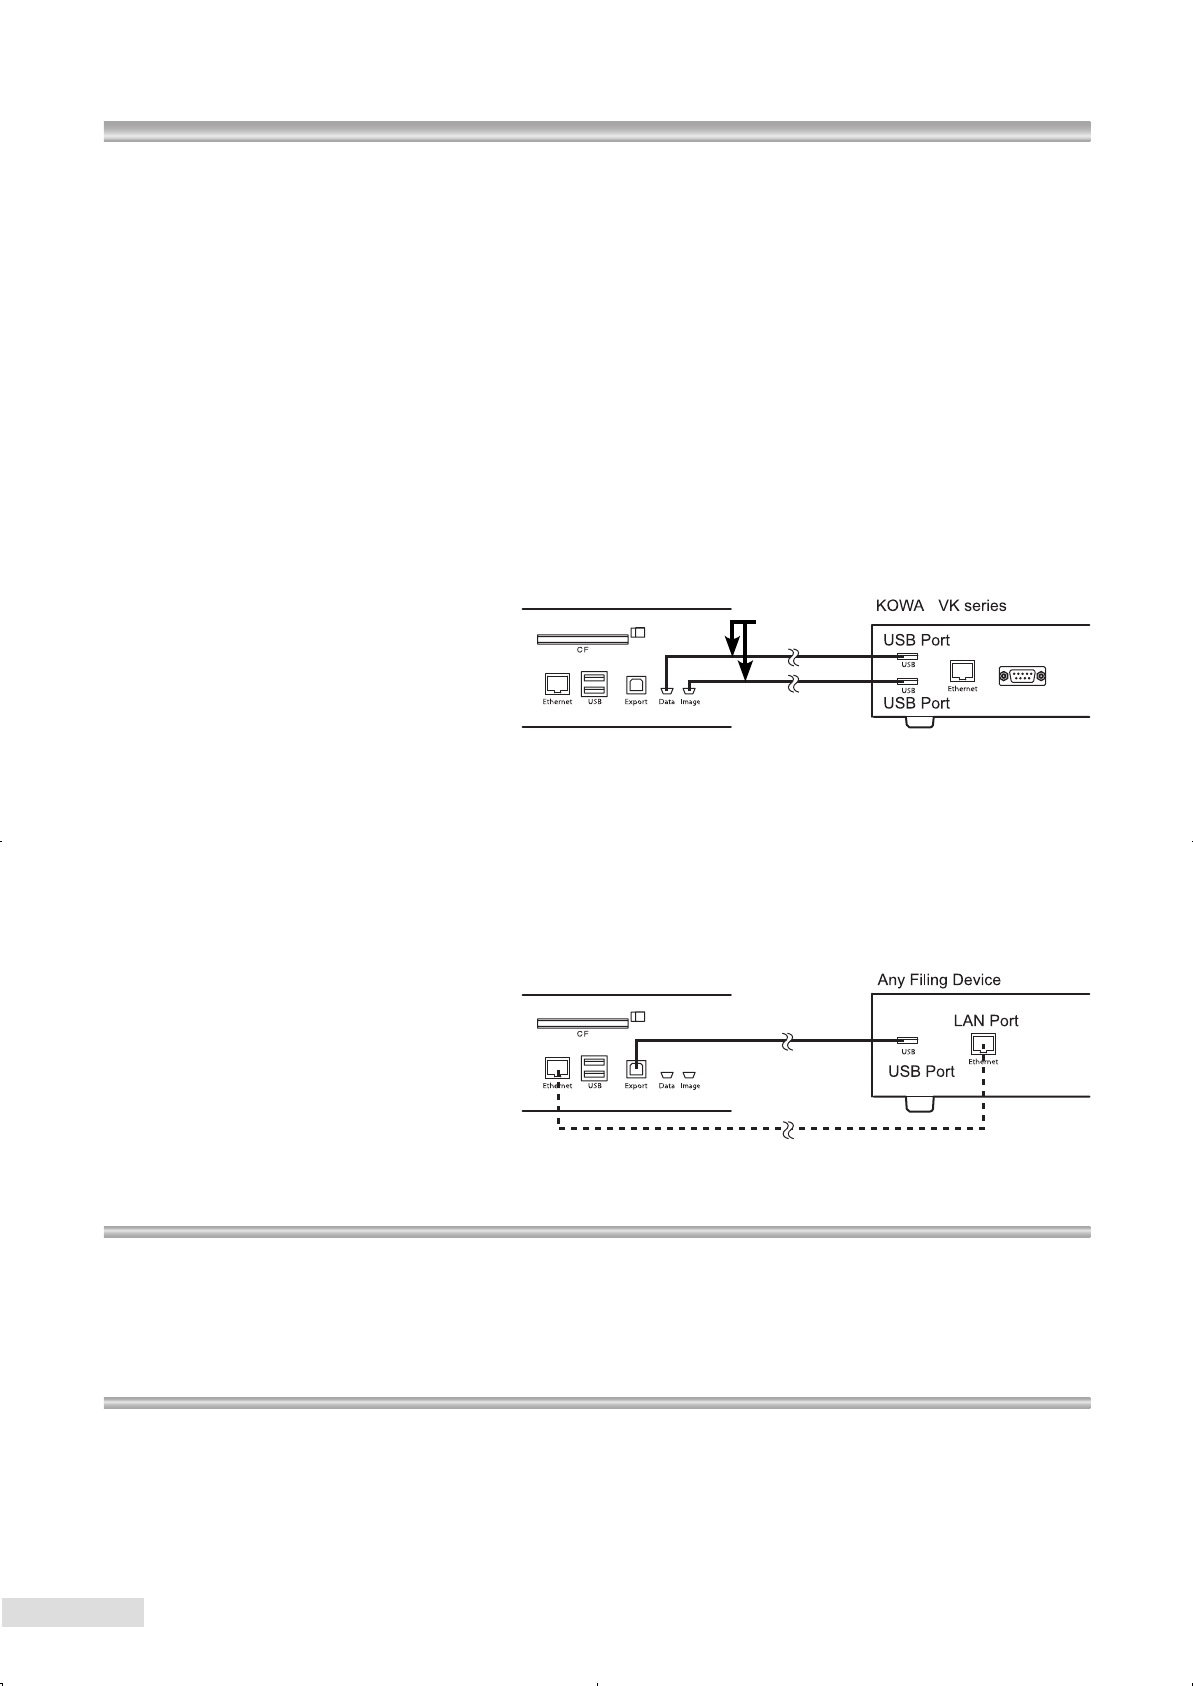
2.3.2 VK connection
In order to use this instrument in the VK connection setting, Kowa VK series (optional device) and the
USB cable 1 are required.
For information on the installation and use of the VK series, refer to the installation and the user manuals
supplied with the VK series.
Use the USB cable 1 to connect “Image output terminal” and “photography condition output terminal”
of this instrument and USB ports of the VK series. Use a designated USB port to connect if you are in-
structed to do so.
After starting up this instrument, change the connection conguration to “VK connection” following the
procedure described in Section 5.1.5. After the instrument is started up, a message “No compact ash
memory card” appears as you switch to the viewer mode; press “OK” and continue.
When the instrument is connected to the VK series and the correct settings are made on both the instru-
ment and the VK series, be sure to photograph images as a trial and check that images and photograph-
ing conditions are correctly acquired.
USB cable 1
2.3.3 Network connection
In order to use this instrument in the Network connection setting, a computer (optional device) with image
acquisition software installed is required along with K9L-SC56B (optional accessory) or K9L-SC56C (op-
tional accessory).
To use the instrument in this setting, you must establish a network containing this instrument and other
external devices. The network must be established by Kowa or a Kowa dealer representative and quali-
ed personnel knowledgeable in network conguration; therefore, please contact Kowa or a Kowa dealer
in advance.
K9L-SC56C
K9L-SC56B
2.4 Turning ON the power
1
Turn ON power switch.
2
It takes approximately 40 seconds for the instrument to be fully ready for operation. Wait until the start-up
logo disappears and photography information is displayed on the LCD monitor.
2.5 Turning OFF the power
1
Make sure that the the instrument is in the capture mode. If it is in the viewer mode, press “CAPTURE
button” to go to the capture mode.
2
Press “EXIT button”. A message appears asking whether you want to end the operation; if there is no
problem, press “OK” to turn off the optical head.
3
The LCD monitor goes dark and all panel lamps except for the Power lamp go off. When the Power lamp
turns orange, switch the power switch to the OFF position.


