19
3 Basic usage
3.4
Mydriatic Fluorescein angiography procedures
This section describes the basic operation procedures for mydriatic Fluorescein angiography.
¿
In some cases, the use of mydriatics may aggravate patient's medical conditions or cause some pa-
tients to go into shock. Be sure to read the instruction for use carefully before using mydriatics, and
follow the instruction.
¿
After photography using mydriatics, patient's pupils are dilated; therefore, patients may experience
glaring or blurred vision. Instruct patient to be careful when they walk or move around and refrain
from driving.
¿
In some cases, the use of uorescent agent may aggravate patient's medical conditions or cause
some patients to go into shock . Monitor the patient closely during photography and make sure that
there are no abnormal changes in the patient. Be sure to read the instruction for use carefully before
using uorescent agent, and follow the instruction.
1
Enter, switch, or check the ID.
According to the system connection conguration, enter, switch, or check the patient’s ID.
In the Stand-alone setting, the patient’s ID may be entered or switched. Refer to 3.5.1 to enter an ID or
switch between IDs.
In the VK connection setting, IDs are managed through the VK series connected to this instrument.
Please read the user manual supplied with the VK series for operational procedures.
In the Network connection setting, the function depends on the external device connected to the instru-
ment. Follow the user manual of the external device for the details on available functions and operational
procedures.
2
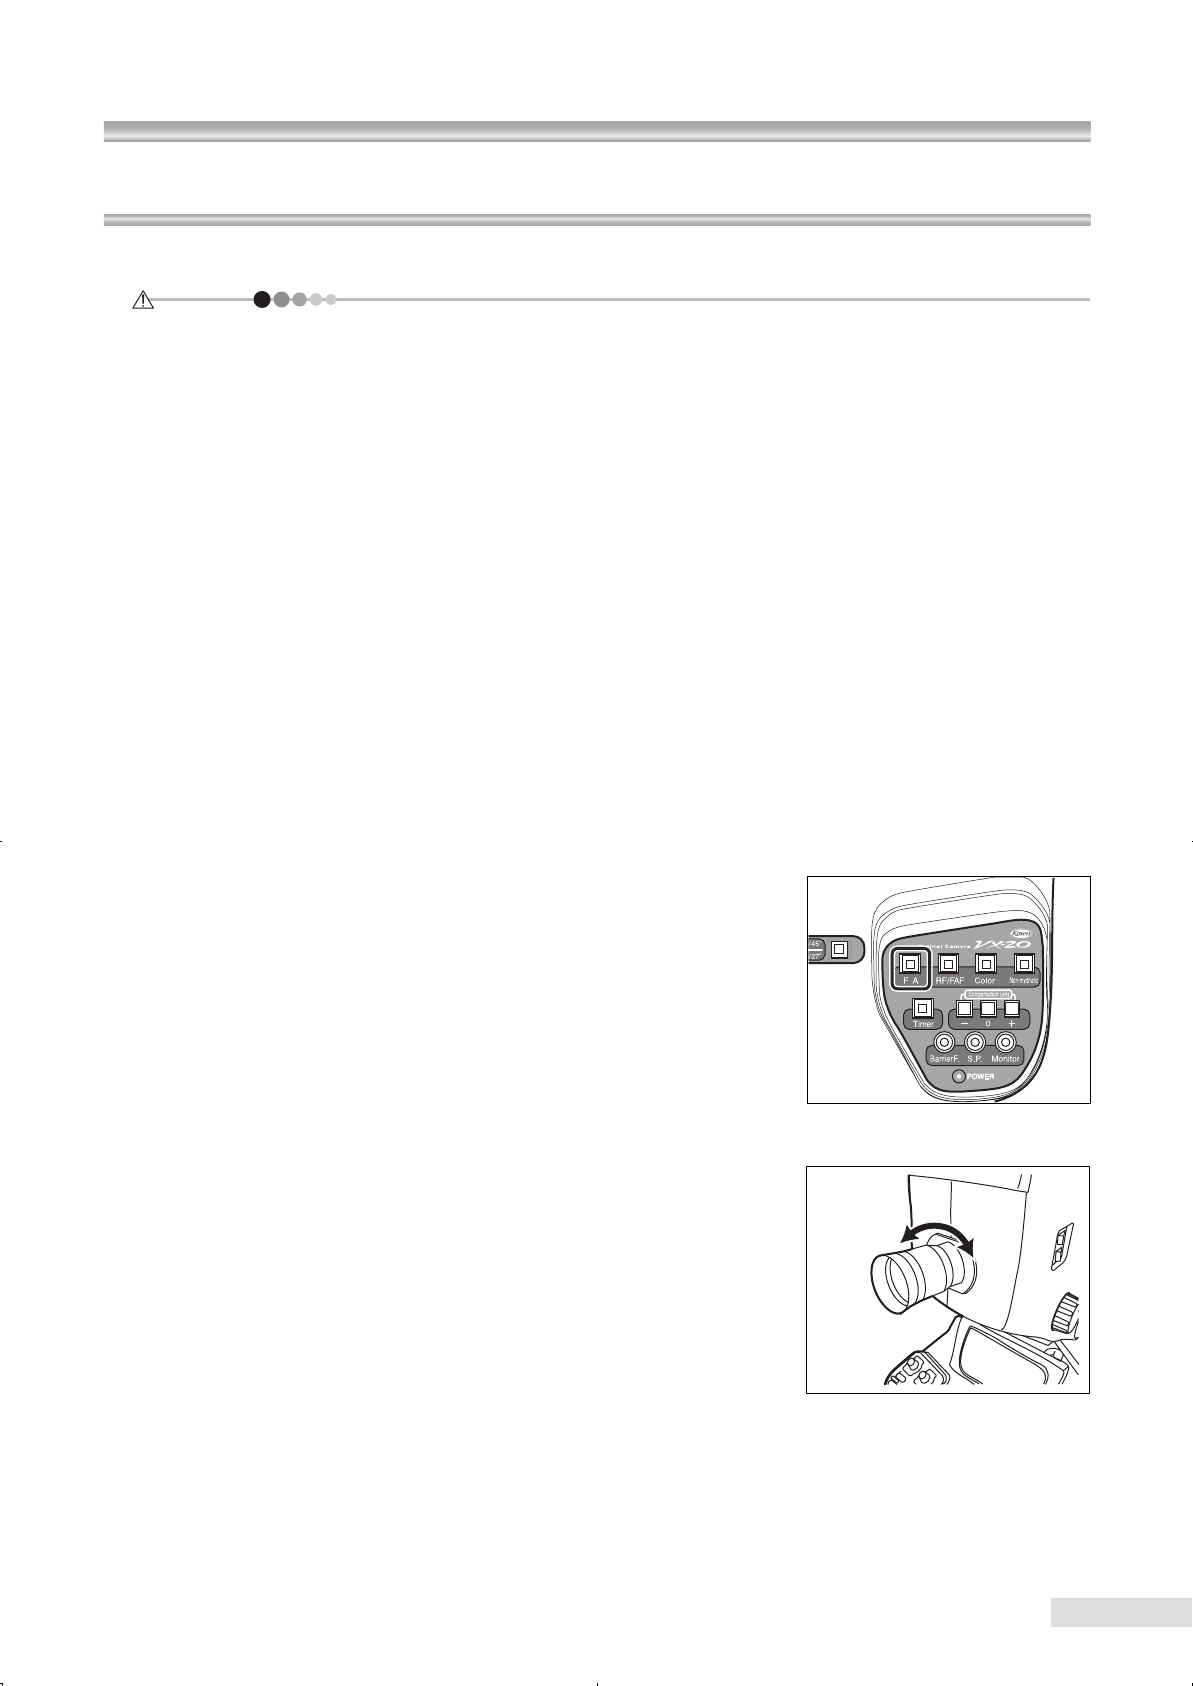
Select a photography mode.
With the “photography mode switching buttons” on the right side pan-
el, press the “FA button”.
3
Compensate the diopter of the optical viewnder (eyepiece)
Clear of all objects within the distance of 3m from the objective lens.
Look through the optical viewnder (eyepiece) and rotate the diopter
adjuster ring until the double lines becomes clear.


