


108
Chapter 4, Setting Up Realtime Effects with Adobe Premiere Pro
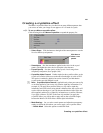
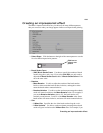
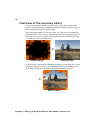
Creating a lens flare effect
The Matrox lens flare effect lets you simulate the light refractions caused by
shining a bright light into the lens of a camera when taking a photo. You can
choose from many different lens flare patterns.
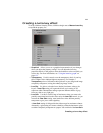
°To set up a Matrox lens flare effect:
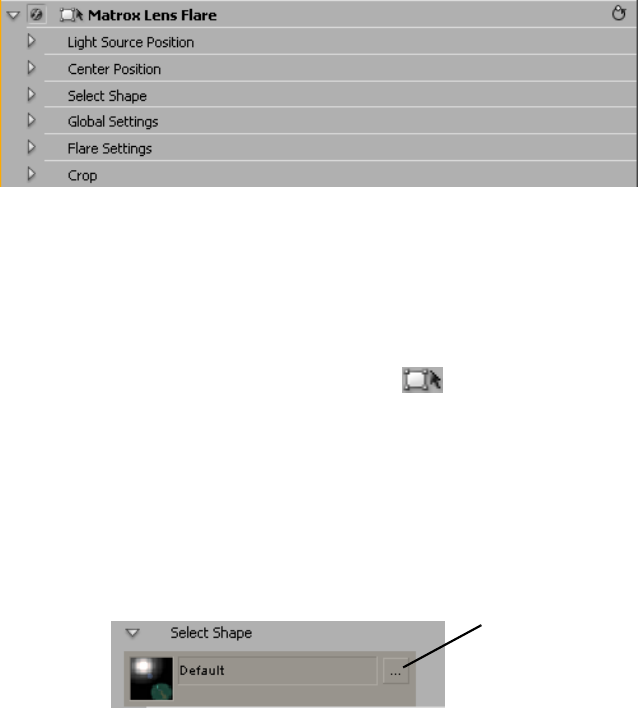
Click the triangle beside Matrox Lens Flare to expand the property list.
•
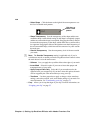
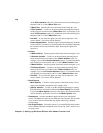
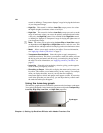
Light Source Position
$ X & Y Position Sets the position of the light source along the horizontal
and vertical axes. The refractions caused by the light source will move in
accordance with its position.
$ Z Position Sets the depth of the light source.
¥Tip You can easily adjust the light source position directly in the Program
Monitor. To do this, click the Transform icon ( ) beside
Matrox Lens
Flare
in the Effect Controls panel. A crosshair will appear in the Program
Monitor. Drag the crosshair to position the light source along the horizontal
and vertical axes.
• Center Position
$ X Position Sets the position of the lens flare along the horizontal axis.
$ Y Position Sets the position of the lens flare along the vertical axis.
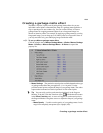
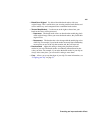
•Select Shape Click the button to the right of the current pattern to see the
list of available lens flare patterns.
• Global Settings
$ (X, Y) Scale Use these controls to make your lens flare smaller or larger.
Full-screen size is represented as 100%. You can shrink your lens flare to
0% or enlarge it to 1000%. Note, however, that by enlarging your clip, the
resolution may become blurry. You can adjust the size controls individually,
or if you select
Fixed Aspect Ratio, you only need to adjust the x axis.
Click here to
select a new
pattern