


118
Chapter 4, Setting Up Realtime Effects with Adobe Premiere Pro
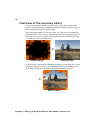
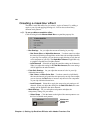
Creating a mask mosaic effect
The Matrox mask mosaic effect lets you create a “region of interest” by adding a
mask to your clip and applying a mosaic effect to it. You can choose from many
different mask patterns.
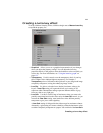
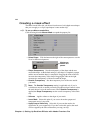
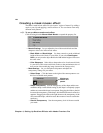
°To set up a Matrox mask mosaic effect:
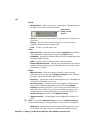
Click the triangle beside Matrox Mask Mosaic to expand the property list.
•
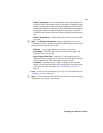
Mosaic Settings Let you adjust the size of the mosaic blocks and the
sharpness of the color in the mosaic effect.
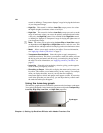
$ Block Width and Block Height Use these controls to set the width and
height of the mosaic blocks in your effect. If you select
Fixed Aspect
Ratio
, you only need to adjust the block width and the height will be set to
the same value.
$ Color Sharpness Select this to sharpen the color of each mosaic block
in your effect. This causes each block to take on the predominant color of
that section of the underlying image (instead of the average color).
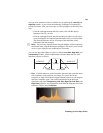
•
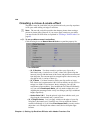
Mask Settings Let you select the mask pattern and adjust the
transparency settings for your effect.
$ Select Shape Click the button to the right of the current pattern to see
the list of available mask patterns.
$ Shape Transparency Sets the transparency of the shape and the area
around the shape. At the default setting (0), the shape is completely opaque
and the area around the shape is transparent. Dragging the slider to the left
increases the transparency of the shape, which makes the mosaic effect less
apparent. Dragging the slider to the right decreases the transparency of the
area around the shape, which increases the amount of mosaic outside the
mask area.
$ Outside Transparency Sets the transparency level of the area outside
your mask.
Click here to
select a new
pattern