


61
Creating a primary color correction
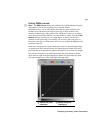
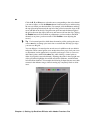
luminance of your clip directly within the graph. For more information, see
“Using the luma mapping graph” on page 72.
$ Numerical Lets you adjust the luma mapping settings numerically by
entering values in the text boxes, or by dragging the corresponding sliders.
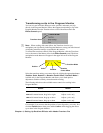
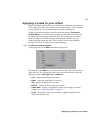
• Input Levels (Black and White) These controls let you fine-tune your
clip’s brightness and contrast by changing the luminance value that
represents black, white, or gray. Doing so expands or compresses the
range of luminance levels in your clip, which increases or decreases your
clip’s tonal range.
For example, by increasing the black value, you set black in your clip to
a higher luminance value, which compresses the luminance range and
darkens your clip proportionally.
• Output Levels (Black and White) These controls let you map the
values under
Input Levels to any level of black and white. You can
reduce contrast in your clip, or reverse the luminosity of your clip by
setting black to a higher value than white.
• Gamma Use this to adjust the midtones in your clip without adjusting
black or white.
•
Mask Allows you to apply a mask to your effect. For more information,
see “Applying a mask to your effect” on page 57.
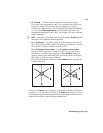
Using Split View
The Split View option allows you to split your clip in two for preview on your
Program Monitor and your video monitor. One section displays your clip as you
adjust the color correction controls, while the other section of the clip remains
unchanged.
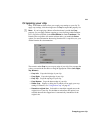
There are two ways to enable Split View. You can select the
Enable Split View
option in the
Effect Controls panel, or work directly in Adobe Premiere Pro’s
Program Monitor
using your mouse.
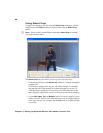
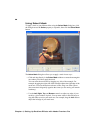
Working with Split View in the Program Monitor
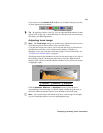
To activate the Split View controls in the Program Monitor, click the Transform
icon ( ) beside the name of the Matrox color correction effect
in the Effect
Controls
panel. The Split View button will appear in the upper left corner of the
Program Monitor:
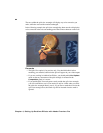
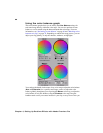
Enable Split View by clicking the Split View button. You can then drag the
handles on the corners of the split rectangle to define the area you want to split.
You can also drag the split rectangle to move it to a specific region of your clip.
Split View button