


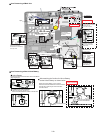
7-23
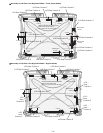
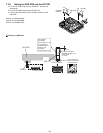
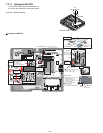
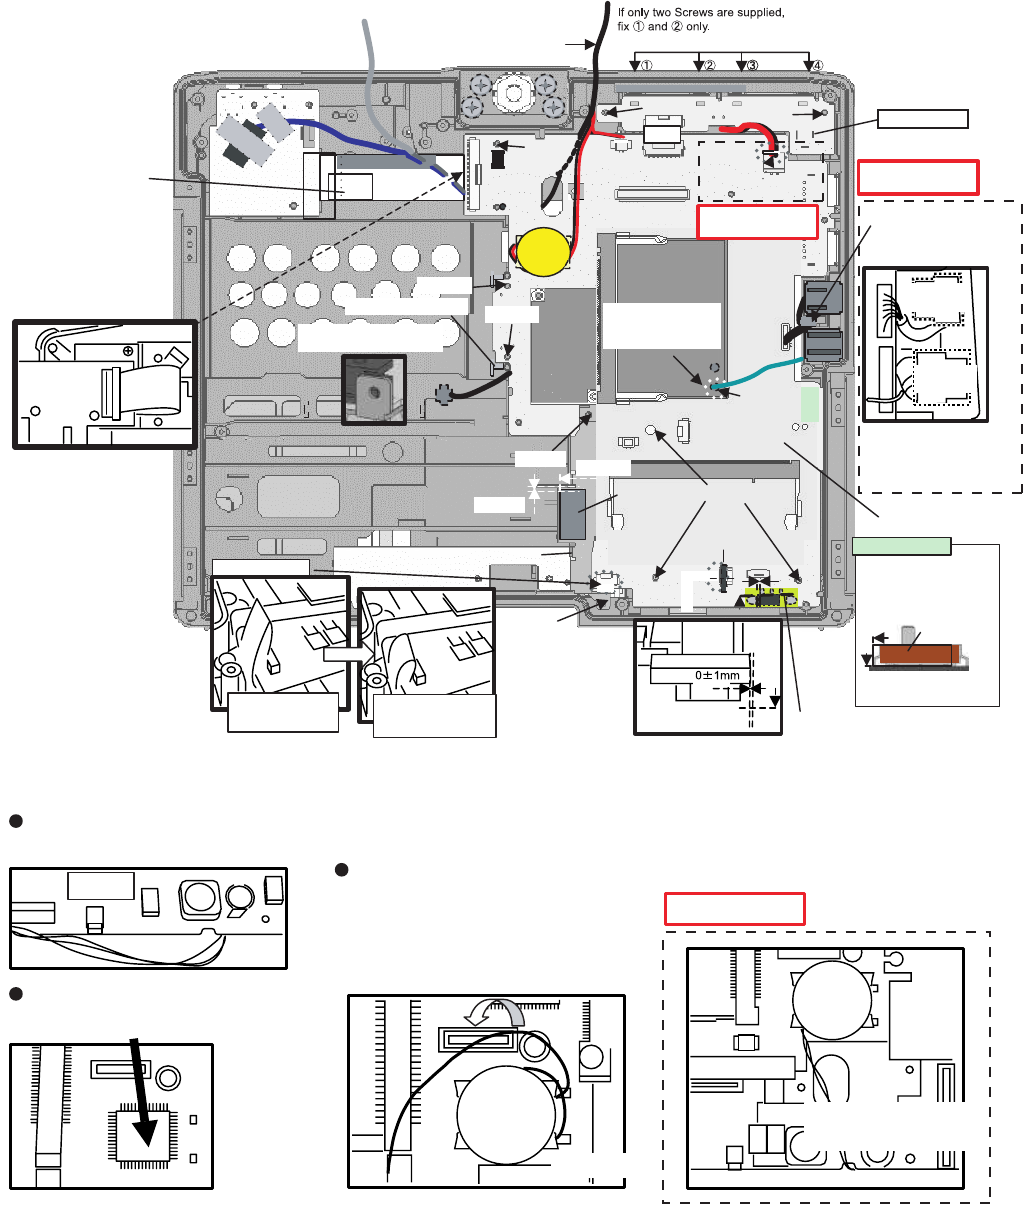
! Line Processing of Main Unit
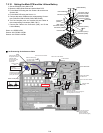
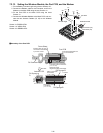
! Line Processing of the Lithium Battery
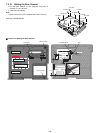
FFC Spacer
Screw(D Sub)
Tape
MAIN PCB
White
Connect.
Attach before
setting
the Main PWB.
Main PCB Switch
Wipe off using alcohol
before attaching.
I/O PCB ASSY
Safety Working
0~0.5mm
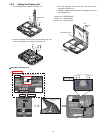
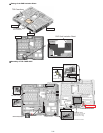
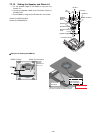
Connect it first when
setting the Main Board.
Then attach the Coin Battery
to the Top Case.
MAIN PCB
Insert the surplus
length between the Modem
Connector and
the LAN Connector.
Connect the FFC.
Avoid running over
the Modem Connector
and the LAN Connector
(yellow area).
0~0.5mm
When inserting,
use the jig to receive
the Cable.
Screw
Screw
Screw
Screw
Screw
Screw
Bat Con Angle
Bat Cushion
Tape
FFC CN
Stopper
HDD Guide Plate
Screw
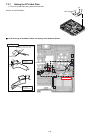
Between the Main Board
and the Top Case
0~2mm
Match to
the edge
of the
Board.
After connecting
the FFC, shape
it over the Board.
Then insert the
shaped part to the
BAT Connector.
Modem
Connector
LAN
Connector
Screw
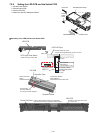
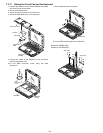
Safety Working
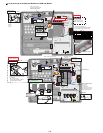
Lithum Battery
Connect the Cable to the Connector CN3 of the Board.
(Right angle type)
After attaching the Cushion for Lithum Battery,
set the Lithum Battery as shown below.
Attach the Lithum Battery on the Cushion.
Draw the Lead Wire toward the end of the Board.
Arrange the surplus length of the Lead Wire
as shown below.
Cushion for Lithum Battery
Attach on the IC14 (Super I/O).
Safety Working
Attach the white adhesive surface to the IC side.
CN3
End of the Board.
Pass the Lead Wire through
the notch of the Board.