


IP Setup and Network Address Translation 11-7
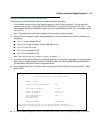
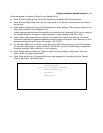
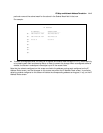
Follow these steps to configure IP Setup for your Netopia R3100:
■ Select Ethernet IP Address and enter the IP address for the Netopia R3100’s Ethernet port.
■ Select Ethernet Subnet Mask and enter the subnet mask for the Ethernet IP Address that you entered in
the last step.
■ Select Default IP Gateway and enter the IP address for a default gateway. This can be the address of any
major router accessible to the Netopia R3100.
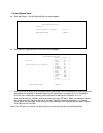
A default gateway should be able to successfully route packets when the Netopia R3100 cannot recognize
the intended recipient’s IP address. A typical example of a default gateway is the ISP’s router.
■ Select Primary Domain Name Server and enter the IP address for a domain name server. The domain
name server matches the alphabetic addresses favored by people (for example, robin.hood.com) to the IP
addresses actually used by IP routers (for example, 163.7.8.202).
■ If a secondary DNS server is available, select Secondary Domain Name Server and enter its IP address.
The secondary DNS server is used by the Netopia R3100 when the primary DNS server is inaccessible.
Entering a secondary DNS is useful but it is not necessary.
■ Select Domain Name and enter your network’s domain name (for example, netopia.com). Entering a
Domain Name is strongly recommended.
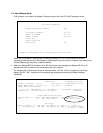
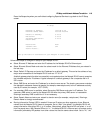
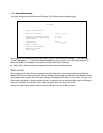
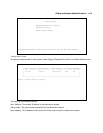
■ Select Exported Services. The Exported Services screen appears with three options, Show/Change
Exports, Add Export, and Delete Export.
Exported Services
(Local Port to IP Address Remapping)
Show/Change Exports...
Add Export...
Delete Export...