5-6
Upgrades and Options
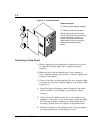
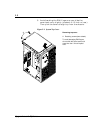
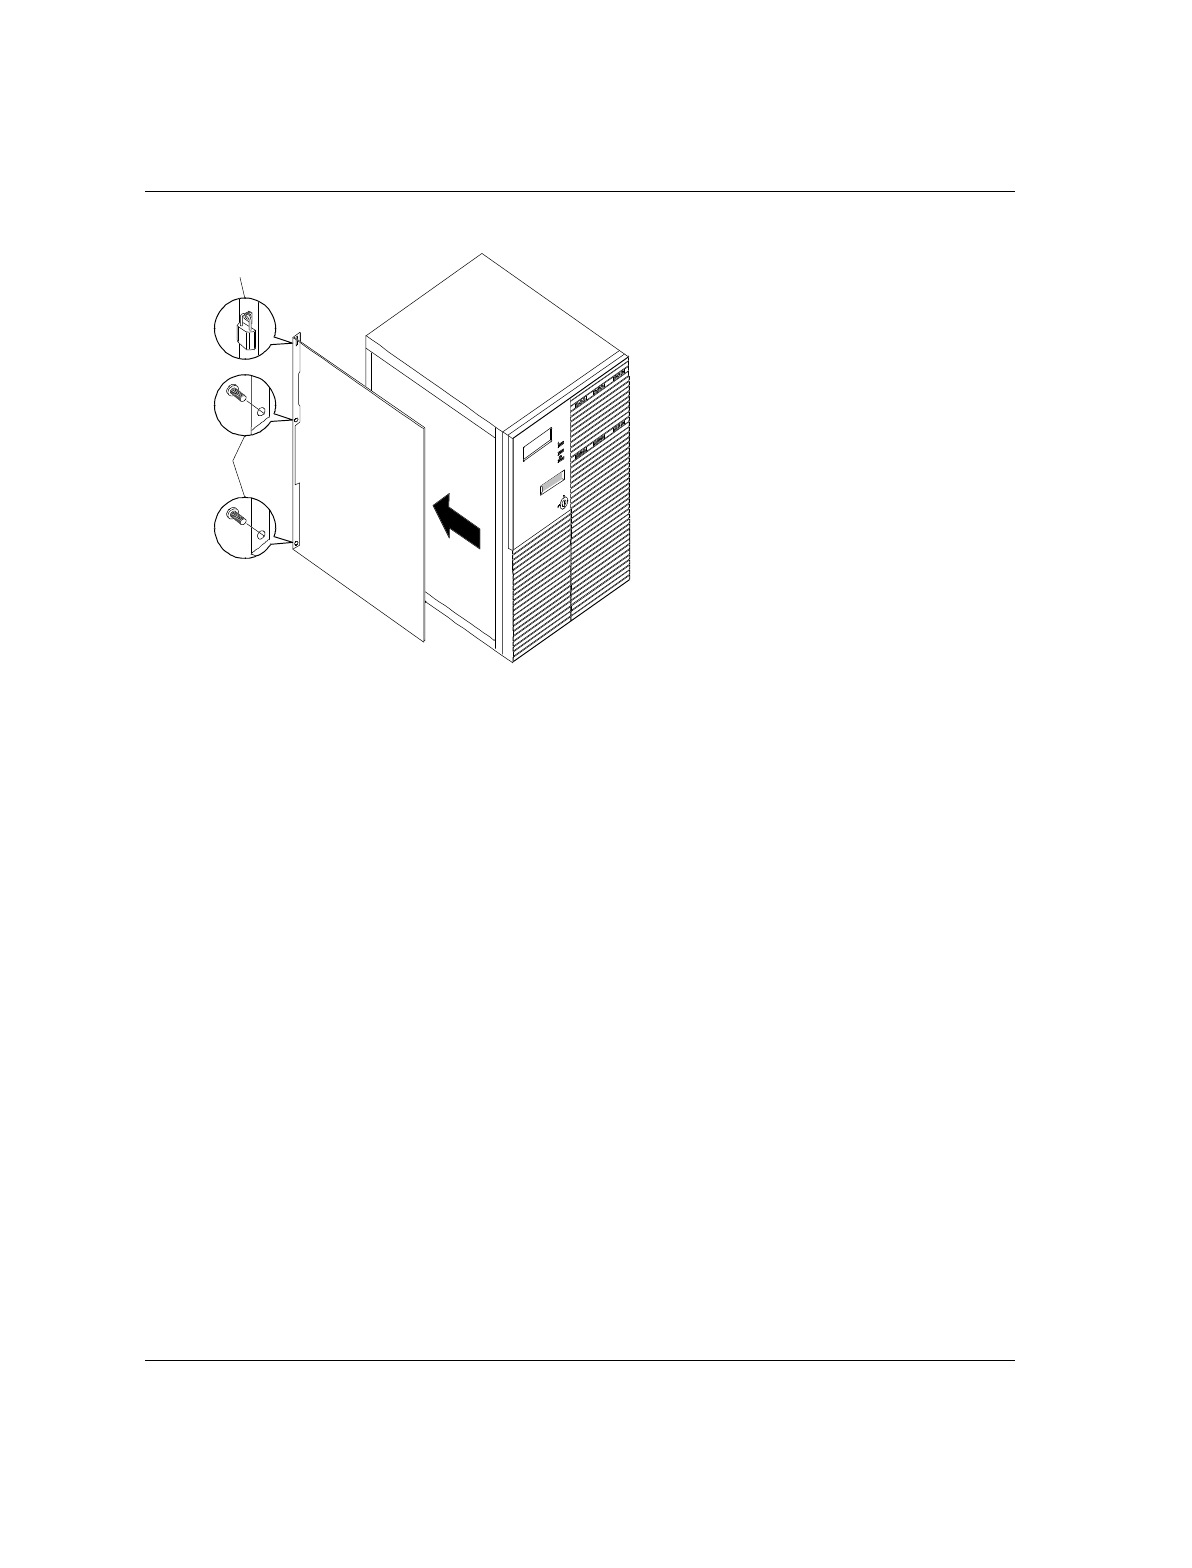
Figure 5-1. System Side Panel
A
B
System side panel
A Padlock at back edge (if installed)
B Retaining screws (two at back)
External side panel over the board
area is shown; procedure is the same
for both side panels. (You do not
need to remove the internal board
support panel if you do not need to
access the processor/memory
board.)
Installing a Side Panel
1. Before replacing the side panel, make sure no tools
or loose parts have been left inside the system
chassis.
2. Make sure all option boards are firmly seated in
their respective slots and that all interior cables are
properly connected.
3. Orient the cover so the padlock slot at the back edge
fits over the loop at the back edge of the chassis (see
Figure 5-1).
4.
Align the top and bottom rows of tabs on the cover
with the slots in the chassis, and carefully push
inward.
5.
Slide the cover toward the front so the tabs firmly
engage in the slots. If the cover does not slide freely
all the way forward, make sure the padlock slot is
correctly placed over the loop on the chassis back.
6.
Attach the cover to the chassis with the two screws
you removed earlier, and tighten firmly.


