5-9
Upgrades and Options
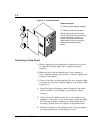
Installing the Top Cover
1. Before replacing the top cover, make sure no tools or
loose parts have been left inside the system chassis.
2.
Make sure all option boards are firmly seated in
their respective slots and that all interior cables are
properly connected.
3.
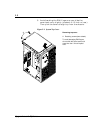
Lower the cover straight down with the front edge
about 1/2 inch back from the edge of the plastic
bezel (front cover). The sides of the cover should be
outside the chassis metal.
4.
Carefully slide the front edge of the cover forward
until it stops at the edge of the front bezels.
5.
Reinstall two retaining screws at the back.
6.
Reinstall the two side panels.
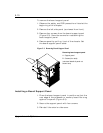
Removing a Board Support Panel
A metal panel supports the memory board and both
processor boards. To remove a processor or memory
board, you must remove this board support panel.
Notice: To prevent damage to the system board from a
partially inserted processor/memory board and to
provide proper cooling and airflow, always install the
metal support panel before installing the chassis side
and top covers and turning on the system. Operating
the system without this support panel in place can
damage system parts.
Caution: If the system has been running, any installed
processor and heat sink on the processor board(s) will
be hot. To avoid the possibility of a burn, be careful
when removing or installing system board components
that are located near processors.


