


3. Operation
3-26
February 2001 3160-A2-GB21-90
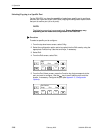
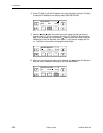
12. Press F2 (Read) or F3 (R/W).
The Read selection allows read-only access (SNMP “Get”) to the accessible
objects in the MIB when community name 1 is used. The R/W selection allows
Read/Write access (SNMP “Get” and “Set”) to the objects in the MIB. Write
access is allowed for all objects specified as read/write in the MIB. Read
access is allowed for all objects specified as read-only or read/write.
Configuring SNMP Traps
A trap is an unsolicited message that is sent from the DSU/CSU to an SNMP
manager when the DSU/CSU detects certain pre-specified conditions. These
traps enable the SNMP manager to monitor the state of the network.
The SNMP Trap configuration option must be enabled for trap messages to be
sent over the communications link. You must specify the number of SNMP
managers that are to receive traps from this DSU/CSU, an IP address for each
SNMP manager specified, and the type of traps to be sent from this DSU/CSU. For
more information, refer to Appendix C,
Configuration Options
,
and
SNMP Traps
in
Chapter 4,
Maintenance
.
Enabling SNMP Trap Messages
Procedure
To enable SNMP trap messages from this DSU/CSU:
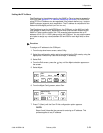
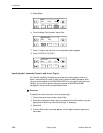
1. From the top-level menu screen, select Cnfig.
2. Select the configuration option set to be copied into the Edit area by using the
appropriate Function key. Use the scroll keys, if necessary.
3. Select Edit.
4. From the Edit screen, press the key until the Alarm selection appears on
the screen.
5. Select Alarm.
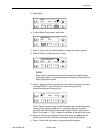
6. Press F1 (Next) until the SNMP Trap configuration option appears.
F1
F2 F3
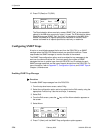
Access 1:
Next Read R/W
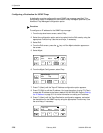
F1
F2 F3
Edit:
User Alarm Mgmt