


Using a Web Browser 3-15
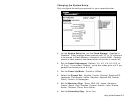
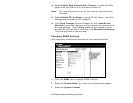
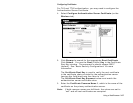
8. Set the Regulatory Domain, which is the country of use.
9. Set the AP Density: Low, Medium, or High. If the communication
quality (transmit rate) between devices on a network drops below
a certain level, the devices scan for another access point in the
area offering better transmit rates, etc.
10. Set the Encryption Mode: Disable, 64 BIT Encryption, 128 BIT
Encryption, WPA, WPA2, WPA2-WPA. WPA2-WPA works as
either WPA2 or WPA. The encryption mode determines the
algorithm used to encrypt messages.
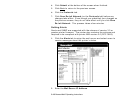
11. Set the Authentication Type: Open, Shared, TLS, TTLS, LEAP,
PEAP, EAP-FAST, or PSK. The authentication type specifies how
users are identified and verified on a network. These options vary
depending on what was selected as the Encryption Mode. See
“Basic Security Configurations” for more information.
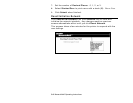
12. Enable WPA Group Key to use a group key for data link
encryption.
13. Enter the maximum number of Authentication Attempts.
14. Enter the Pre-shared key, which must be exactly 64 hex
characters. If using a pass-phrase, it must be 8 to 63 displayable
characters.
15. Set the Authentication Protocol: PAP, or MSCHAP_V2. See
“Basic Security Configurations” for more information.
16. Enter the User ID.
17. Enter the Password.
18. Click Submit when you are finished.
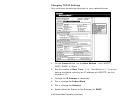
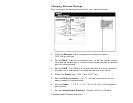
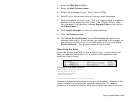
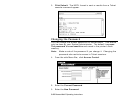
19. Click the Protocols tab.
20. Click Save Re-init Network (on the Protocols tab) before any
changes take effect. Even though you submitted your changes on
the previous screen, they do not take effect until you click Save
Re-init Network. This process takes a few minutes.